In my previous article, Windows XP LogonUI Changer – Great Way to Change Your Logon Screen for Windows XP Lovers, I’ve introduced a tool that users can use that will allow them to change their logon screen on Windows XP. This time I will be explaining how it is actually done. For advanced users, I’m sure it’s a piece of cake. But for beginners, this guide will help.
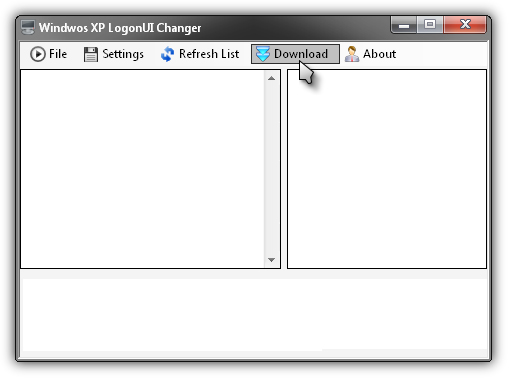
To begin, first, make sure you’ve already installed Windows XP LogonUI Changer. If not, click the link above to go to the previous article and download the application. Once it is installed, launch the program. You will notice the panel is empty because it doesn’t come with default logon screen or built-in logon screens where you can select from. You have to download them yourself. To download your first logon screen, click on the “Download” button.
Double-click any of the two links in the folder that opens to open it on your web browser: Deviant Art Logon Collection or Last Windows 7 Logon Screen. The Last Windows 7 Logon Screen link will bring you directly to the “Windows 7 Default Login 5” logon screen while the Deviant Art Logon Collection link will bring you to a page that lists many different logon screens for Windows XP.
Select a logon screen from the list if you select the Deviant Art collection page to see how it looks like. Check the description of the logon screen for information. The author sometimes list the files included in the download and may also indicate the applications that can be used to apply the logon screen. If the file uses the “.logonxp” extension name, it means it requires LogonStudio which is a different program. Windows XP LogonUI Changer is not compatible with “.logonxp” files. It can only open logon screens in EXE format (.exe). Click on the download button on the right of the screen to download the selected logon screen.
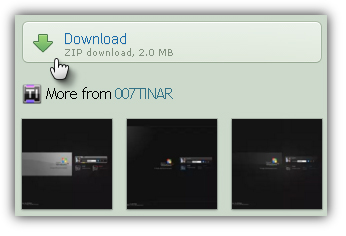
The file is in ZIP format so make sure you have WinZip, WinRAR, or 7-Zip to unpack the file. Once downloaded, go to the download folder and unpack the file. After extracting the contents, go back to Windows XP LogonUI Changer, click “File” and then “Import”.
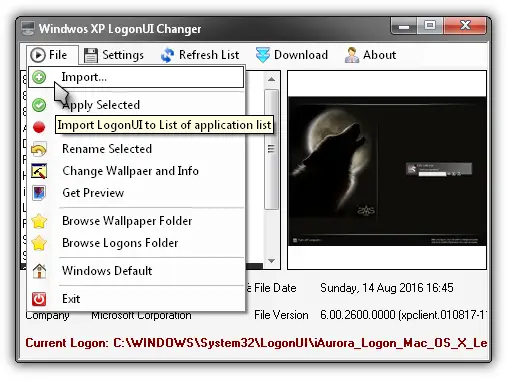
Navigate to the location of the file you just downloaded, select the EXE file (.exe) and click “Open”. This adds the logon screen you downloaded to the application’s list of logon screens which is visible in the panel. The file usually uses the default name, “logonui.exe”, but sometimes uses the name of the logon screen like “Shuriken Concept.exe”.
After importing the logon screen to the program, the logon screen doesn’t have a preview of its own on the preview pane. To generate the preview image, select the name of the logon screen from the panel then click “File” and then “Get Preview”.
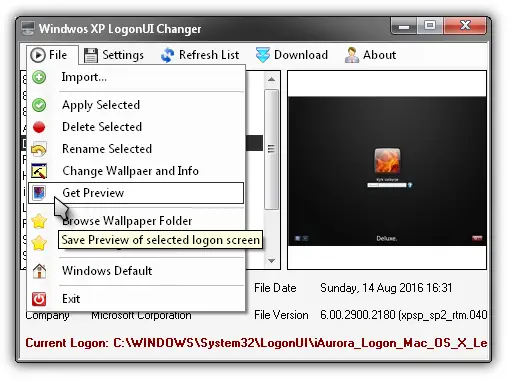
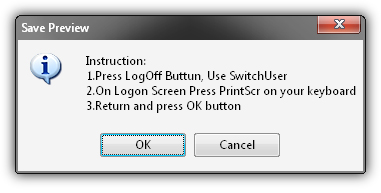
After this, the “Save Preview” dialog should appear. Follow the instructions on the dialog to generate the preview. But if it confuses you, here’s how it is done. When the dialog appears, just leave it on the screen, don’t click any buttons.
Click “Start” then “Log Off” and then select “Switch User”.
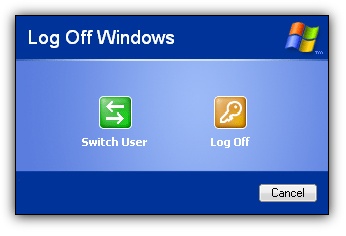
This should bring you to the login screen without logging you off. While in the login screen, press the “Print Screen” button on your keyboard to take a snapshot or screenshot of the entire login screen. When you are finished, enter your password to log in back to your account. Now, in the “Save Preview” dialog, click “OK”. You should now see the preview image of the logon screen on the preview pane.
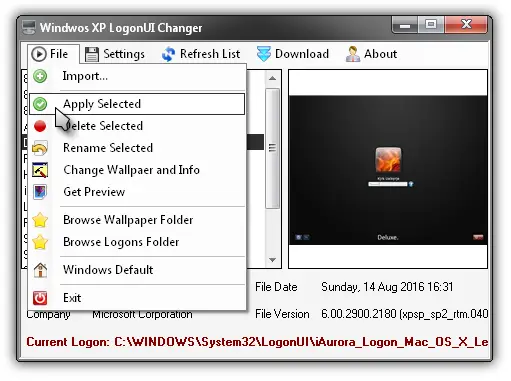
Once you now have a preview, you are now ready to apply the logon screen. To change your current login screen, select the logon screen from the panel then click “File” and then “Apply Selected”. And that’s it! If you want to see it, log off your account or restart the computer.
Windows XP LogonUI Changer has many neat options you can try. Feel free to explore and try them on your computer.


