How to Install VMware Workstation on Windows Host Machine?
VMware workstation allows multiple operating systems to run securely with high performance in a virtualized way. Related and required applications can be installed on the virtual machines. Each virtual machine has a physical machine having its own unique network interface ID and other networking components.
VMware is the market leader when it comes to virtualized desktop environments. The newly released 7.0 VMware supports a desktop virtualization product for Windows 7.
VMware workstation offers the following services;
1. Create New Virtual Machines: On VMware workstation we can create new virtual machines with variety of standard operating systems installed on it.
2. Create New Team: You can create a team by adding several virtual machines and connect them with private LAN sections.
3. Open existing Virtual Machine: If the virtual machine is already created, you can select and open the existing virtual machines to configure them.
The advantage of using VMware Workstation
1. With VMware workstation, you can create virtual machines with up to 4 virtual processor or virtual core. It supports 32 GB of memory per virtual machine.
2. You have the option to pause the virtual machine to save from CPU usage so that it can be used by some other demanding virtual machines.
3. Default printer of the physical machine shows up automatically on the virtualized machine without any extra driver configuration. This makes it easy to print a document seamlessly from the virtual machine.
4. Auto protect features automatically take snapshots of the virtual machine as defined set internal, thus eliminating virtual systems to crash from buggy applications, hardware failures, viruses and other malware attack.
5. VMware workstation has AES encryption feature that protects the virtual machines from prying eyes.
6. It supports running 3D graphics for both 32-bit and 64-bit processor and also supports the Windows Aero feature in Windows Vista and Windows 7.
How to Install VMware Workstation on Windows Host Machine
1. Select the VMware executable file and double click on it. On the welcome installation wizard click next to continue.

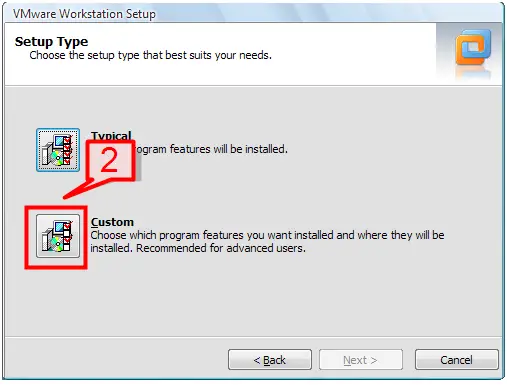
2. Select Custom installation type on the next screen.
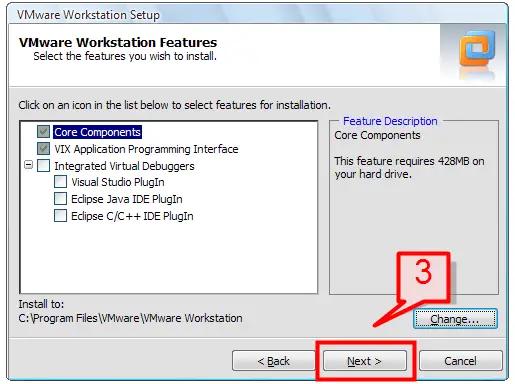
3. Select the required components needed to be installed as part of VMware installation. Also, select the destination folder where VMware files will be installed to. Then, select next to continue installation.
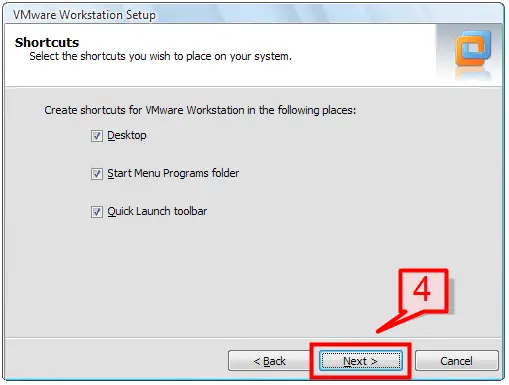
4. Choose the shortcuts where you wish to place the VMware Workstation on your system and click next.
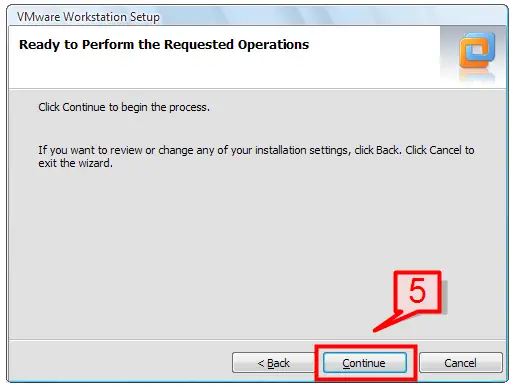
5. Click on the continue button to begin the VMware Workstation installation process.
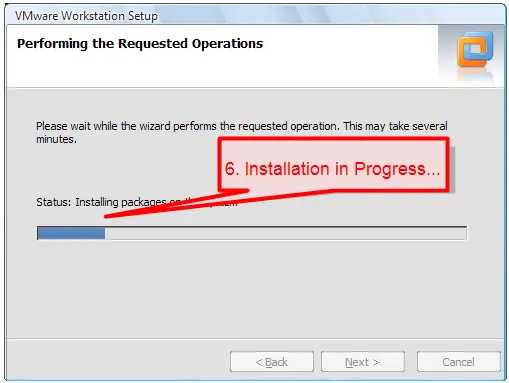
6. VMware workstation installation will then start.
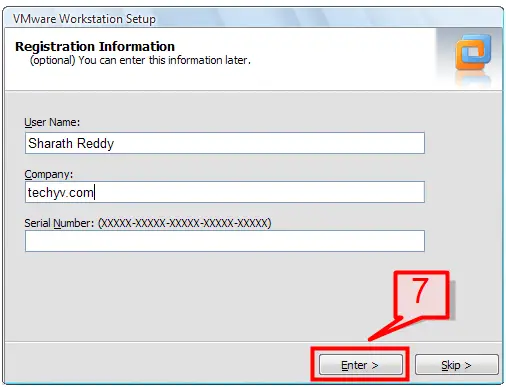
7. Enter the user’s information: the user name, company and the license information which can be found on the Registration Information page and click enter.
8. Click on Restart Now to complete the installation process.
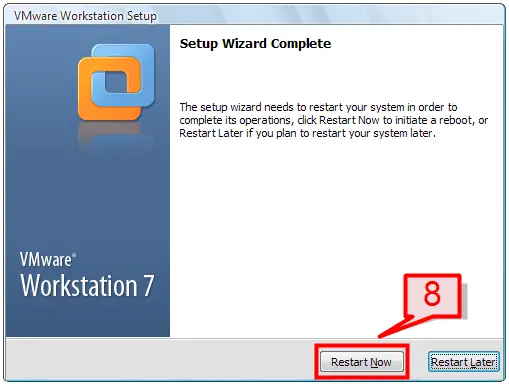
Configuration of VMware Workstation
To start the workstation from the physical host, from the Start menu select Programs-> VMware -> VMware Workstation.
Workstation Preferences
The preference dialog box lets you customize different machine settings that apply to VMware workstation. The changes will be applicable to all the virtual machines that are going to be hosted on the workstation. It is better to have it in its default settings.
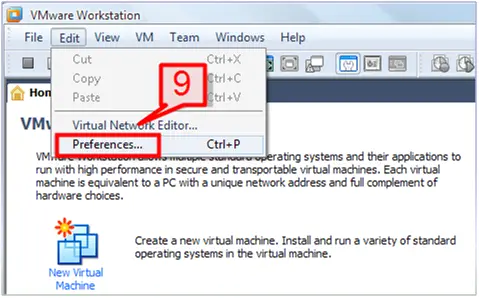
9. On the workstation windows select Edit -> Preference.
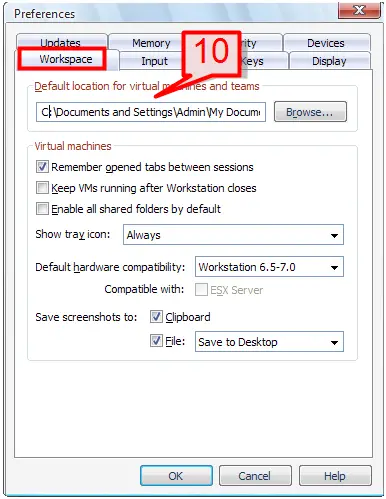
10. The Workspace tab lets you manage the location where you need all the virtual machine files to be stored.
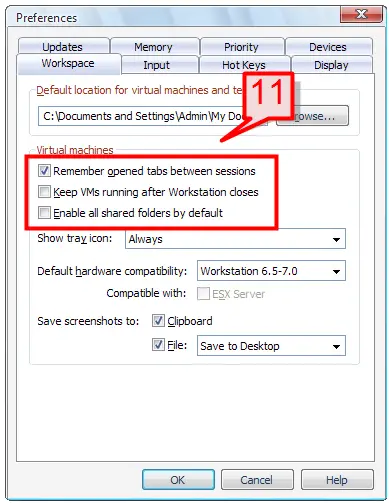
11. You can enable virtual machines to remember if they are used or if they are closed.
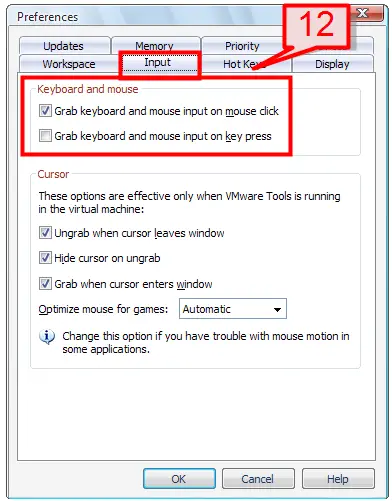
12. Input tab allows you to capture the control of keyboard and mouse. You can select how the virtual machine will grab the keyboard and mouse when the mouse is clicked or the key is pressed on the virtual machine window.
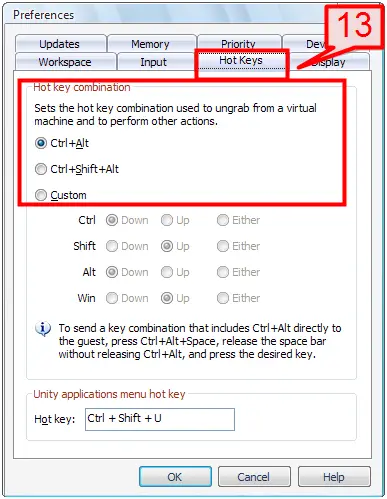
13. In the hot key combination, it lets you choose what combination to use in order to un-grab a virtual machine and to perform other actions.
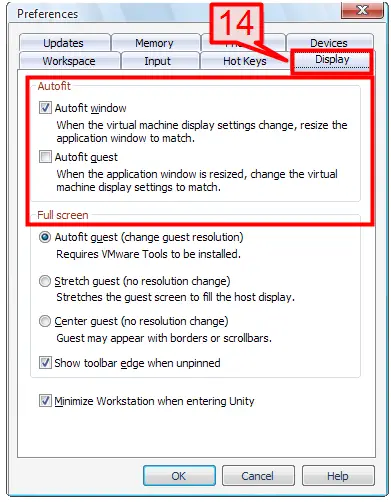
14. Adjust the VMware console and guest operating system display resolution on the Display tab. E.g. If you choose the Autofit window, the opened windows on the virtual machine will automatically be resized whenever there is a change in the display setting on the virtual machine.
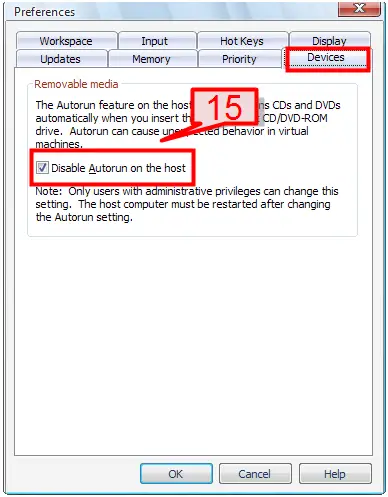
15. Devices tab lets you choose whether you need to run CDs and DVDs automatically when they are inserted into CD/DVD-ROM drive. On most scenarios, disable the auto run on the host to avoid unexpected behavior to virtual machines.
16. Priority tab lets you select whether to take snapshots or restore snapshots in the background.

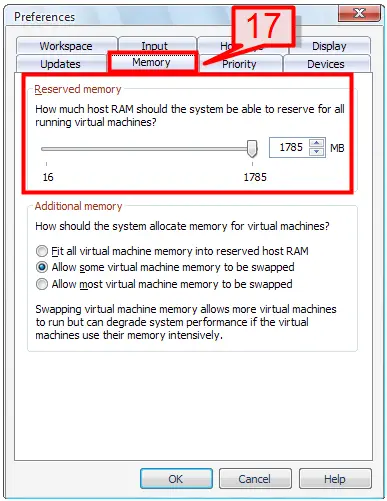
17. Memory tab allows you to select how much physical memory (RAM) should the host physical system reserve for all the running virtual machines. It also allows how the memory allocation should be made between the virtual machines.
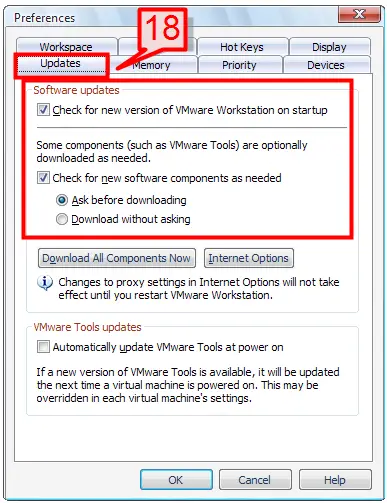
18. Using Update tab, you can specify whether to automatically update VMware tools and download other components or ask the user to install those components after downloading.
Configuring Team
VMware team helps you to setup virtual computer lab consisting of different virtual machines on the host computer. All the virtual machines can be turned on with a single click if you are using the Team feature.
To create a Team
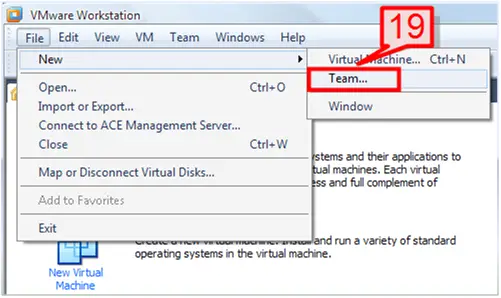
19. Go to the Workstation menu tab and select File -> New -> Team
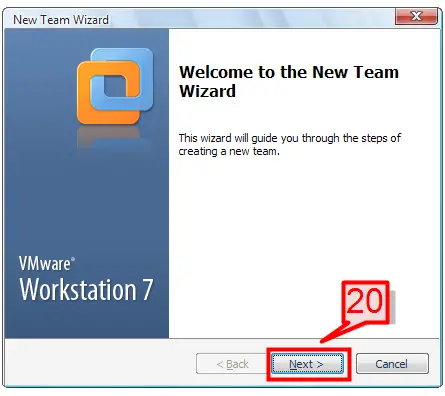
20. On the new team wizard, click next.
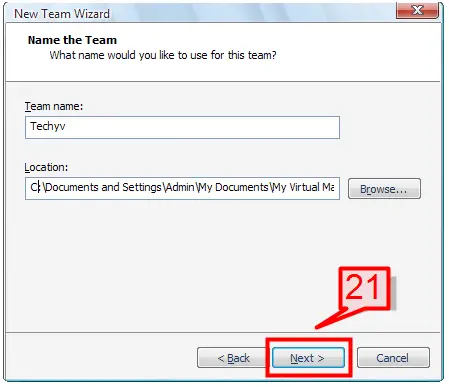
21. Select a team name and select a location where you will be storing the virtual machines files. Click next to continue.
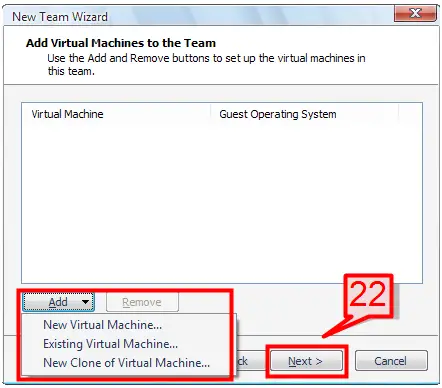
22. In the Add virtual machine page, you have the option to add virtual machines using new virtual machine wizard, or add existing virtual machines or clone virtual machines. Select the most appropriate option and click next to continue
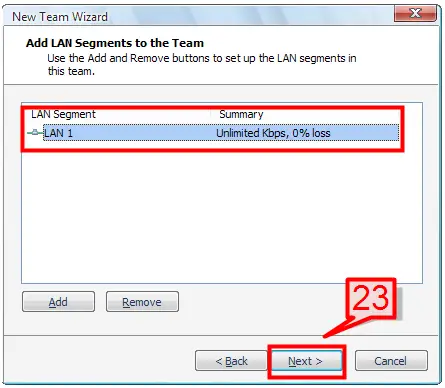
23. In the next LAN segment screen, click on Add to add a LAN segment. You can add multiple LAN segments for your Team virtual machines. LAN segment helps you to connect each virtual machines computer in a network based environment. Click on next to continue team wizard.
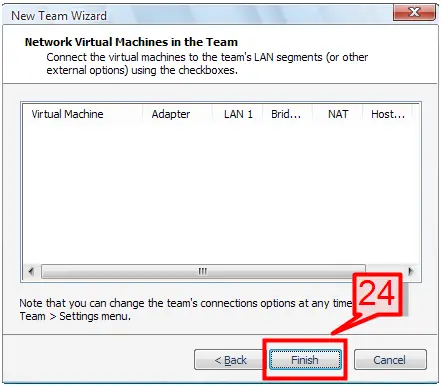
24. Click on Finish to complete the Team wizard.
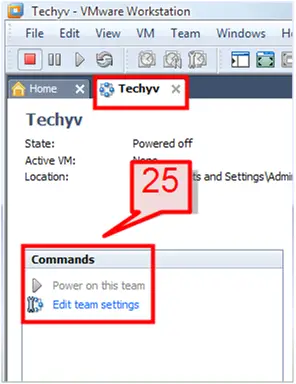
25. Once Team setting is completed, it will be added to the workstation menu tab. You can select the Power on this team link to power on all the virtual machines. You can edit the team settings that we have done during the team installation wizard. Click on Edit team settings to edit the various options.
Please watch this video for a tutorial on downloading and installing VMware Workstation:


