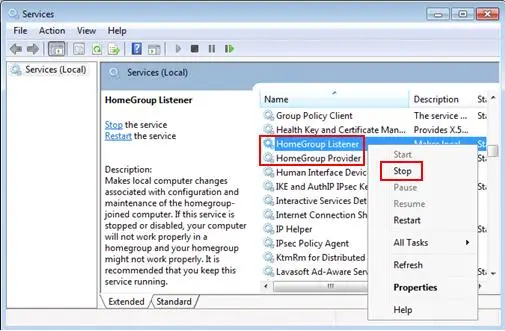
Windows 7 Cannot Leave Homegroup Error Fix
Asked By
0 points
N/A
Posted on - 08/07/2019

When I try to leave a homegroup I formed some time ago, my computer does not allow me to do so and gives me the message Windows could not remove you from the homegroup. How do I fix this windows 7 cannot leave homegroup situation?


")


