
I am not able to access SonicWall LAN resources. I don’t know any possible way by which I can access them. I know the cause of such a problem is due to overlapping subnets. Can anyone help me to configure SonicWALL SSL VPN setup to eliminate this problem?
How To Configure SonicWALL SSL VPN Setup With Overlapping Subnet
SSL VPN enables us to easily get to the corporate SonicWall LAN subnets over the web with secure VPN tunnel but sometimes due to overlapping of SonicWALL LAN subnet and IP of client, we are unable to access the LAN resources.
Follow these steps:
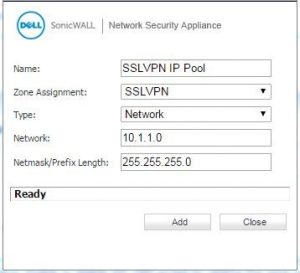
1. To create address object for SSL VPN IP tool.
The IP of SSL VPN should be same as that of either Sonic WALL or client IP. I am going to use the subnet as 10.1.1.0/24.
Now firstly login into your SonicWALL UTM appliance.
Now go to Networks => Address Object => Custom Address Object => ADD button under Address Object to access Add address object window.
Now type in Name field any friendly name of your choice and fill the rest as shown in the picture.
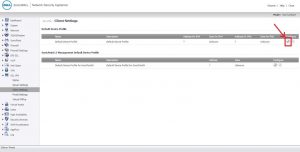
2. Now we need to specify the address object in SSL VPN client settings. For this go to
SSL VPN => Client Settings => Click on the configure.
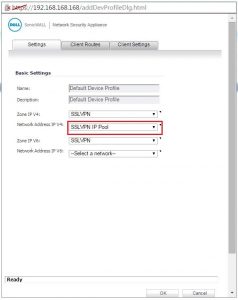
The address of object is to be in the Network Address IPv4 option. This step is mandatory and needs to be done positively.
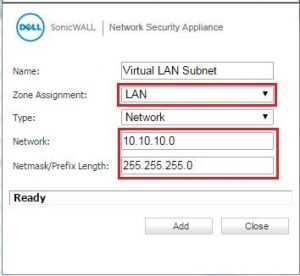
3. Now we need to build Virtual LAN Subnet address object with zone assignment being LAN.
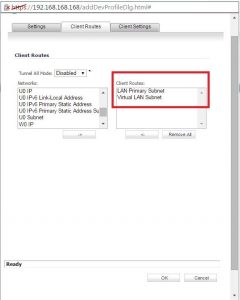
4. In the SSL VPN Client routes you are required to mention the Virtual LAN Subnet address of the object that you are using.
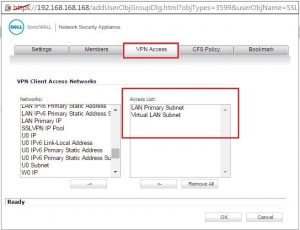
5. Now in the VPN access of SSLVPN Services local group, you will be required to add the Virtual LAN Subnet address object
For this you need to do: Go to Users followed by Local groups. Then you need to click SSL VPN Services. This will enable you to VPN access.
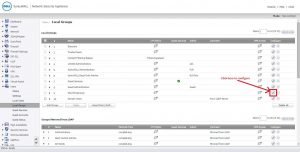
This step is of utmost importance for the client computer to access virtual subnet.
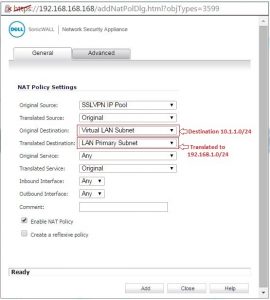
6. Go to NetworksNAT Policies Custom (radio button) and click Add.
7. Create an Access rule. For this, we need to authenticate the system and protect it via security measures such as firewalls. Firewall => Access Rule
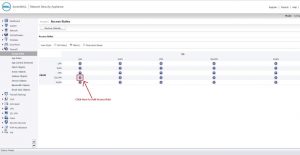
8. Create the following Access rule by going to SSLVPN to LAN page.
For testing, now it will function as when a client with IP 10.1.1.1 tries to get control of server using virtual IP 10.10.10.65. When this traffic reaches SonicWALL device then it translates the destination IP 10.10.10.65 to 192.168.1.65 which is actual LAN IP. And because of the access rule that allows traffic from SSLVPN to LAN zone.


