Group Policy Management
What is Group Policy (GP)?
Group Policy is a tool or console for system administrators to supervise Network resources such as forests, domains, system settings, users’ settings etc.
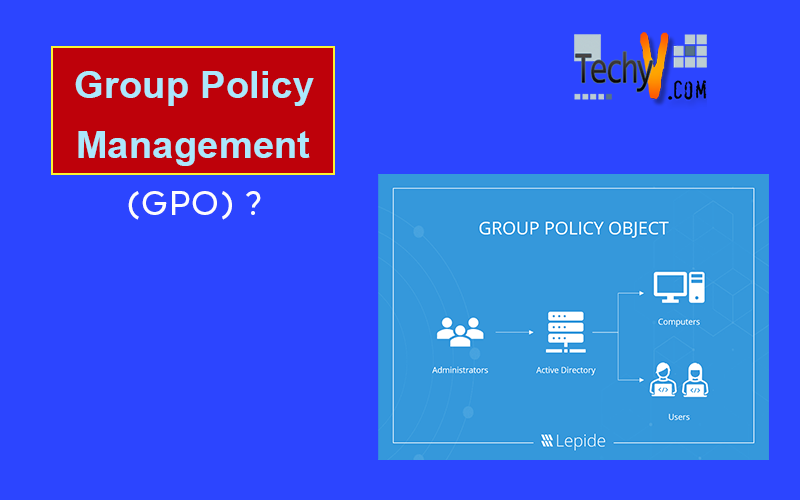
Technically, Group Policy provides a centralized management for administrators to configure and manage OS, programs and all Active Directory resources by utilizing and creating a set of Group Policy Object (GPO) rules, as per the organization requirement.
Why Use Group Policy?
System admin could control the following using GP:
- Local GP Objects: Local GP are the policy settings that relate to local system.
- Site: Administrator can apply certain policies to a site to which the computers are belonging to.
- Domain: This GP is applied to the entire domain level. The various sites and systems under the domain will come under these policies settings.
- OU: The policy can be applied at OU level that will affect the entire domain and sites to which OU they belong to.
Group Policy Management Console (GPMC) on Windows 2008 Server
Windows Server 2008 provides a console called Group Policy Management Console (GPMC) to system administrators that allow one-stop solution to manage, organize, and troubleshoot GP execution for the entire forest or the enterprise.
Now let’s look at Local GP setting which relates to local system (through gpedit.msc) and Domain GP setting that applies at Domain level (through GPMC).
Local GP Configuration
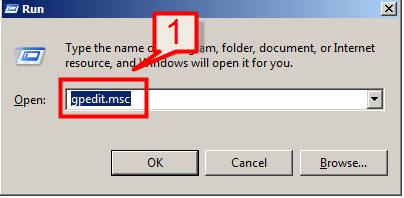
#1. Open Start -> Run>Type gpedit.msc to open local GP settings
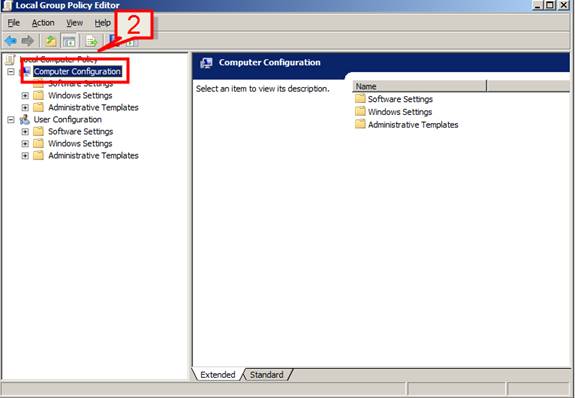
#2. On the editor page, the Computer Configuration is the policy settings that apply to a local computer irrespective of who is logged in to that system.
Note: Computer Configuration policy changes are being reflected in local machine HKEY_LOCAL_MACHINE registry key hive.
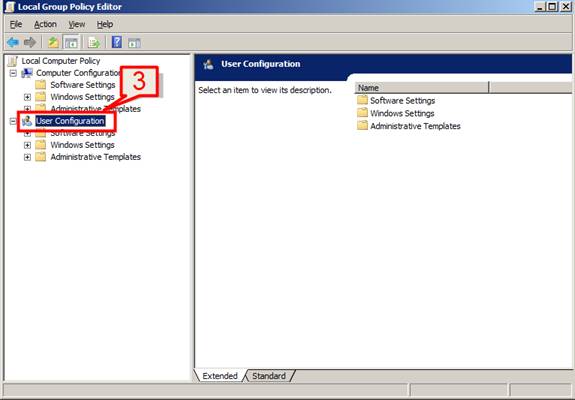
#3. The User configuration is the settings that we can apply for users who log in to the machine.
Note: User Configuration policy changes are being reflected in local machine HKEY_CURRENT_USER registry key hive.
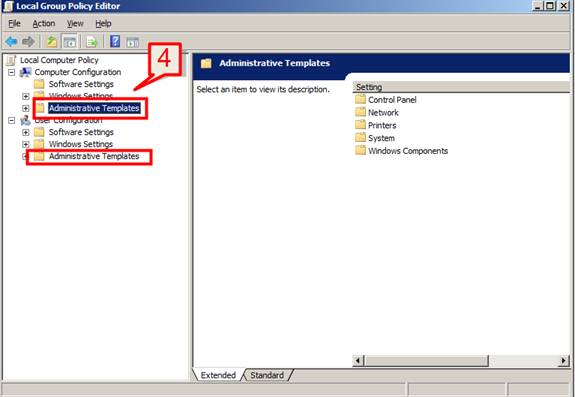
#4. On each of the configuration node (i.e. computer and user) we have Administrative Templates settings. These policies are registry-based settings.
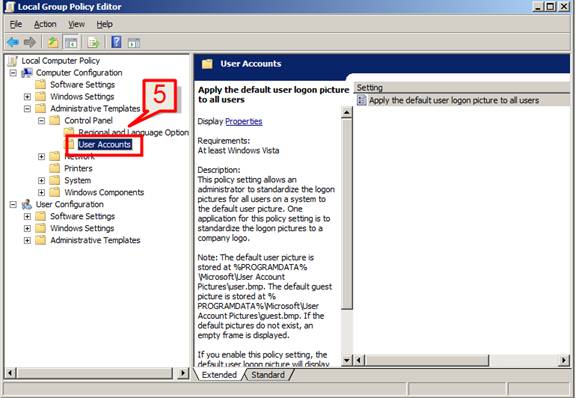
#5. Let’s edit the Administrative Templates policy settings.
Select Administrative Templates under Computer Configuration, expand the node and select one of the templates that you wish to change
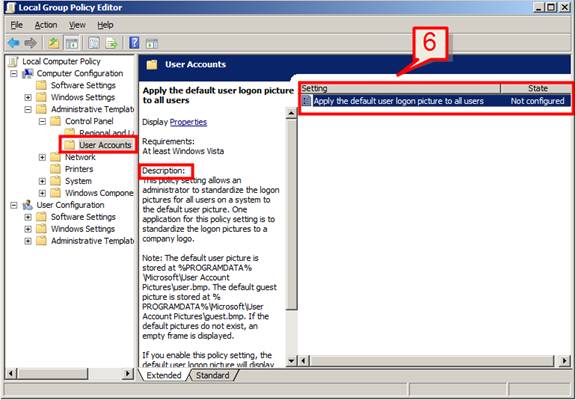
#6. The right pane on the console will show the settings for that template along with a description of the setting.
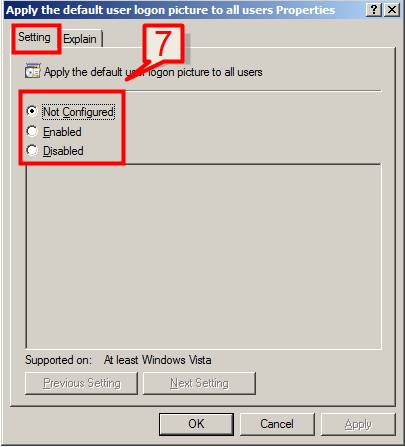
#7. Open the Setting to edit the policy.
Each policy setting has 3 states:
- Not Configured: The registry changes are not yet applied
- Enabled: Registry changes are applied to reflect the policy configuration
- Disabled: Registry changes are not yet configured for policy change configuration
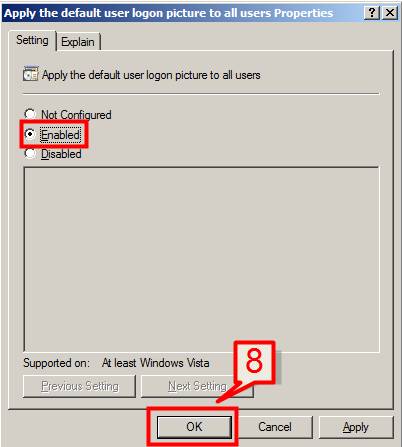
#8. Select the required change to be done, choose Enabled, and click OK to change the policy.
Likewise, we can configure other templates settings on the Local Policy Editor.
We will now look at Group Policy Management for the AD. The GPMC console is installed as default if the server has AD DS installed.
Installation of GPMC
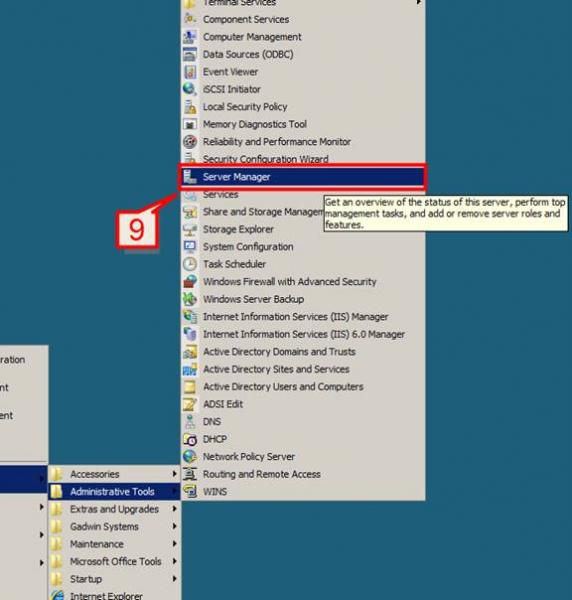
#9. Open Start -> Programs -> Administrative Tools -> Server Manager
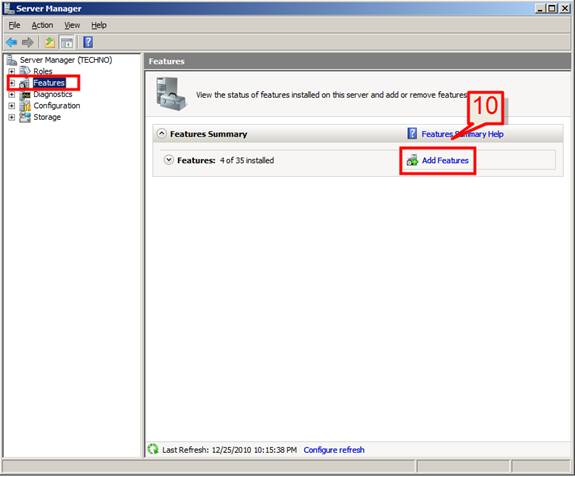
#10. Select Features in Server Manager node and click Add Features on the right node.
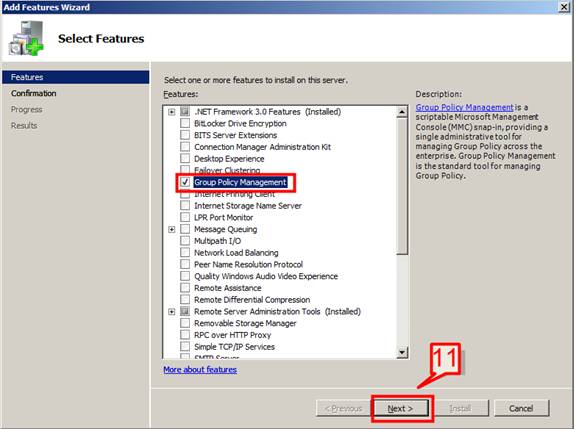
#11. Choose Group Policy Management on Select Features screen, and click Next.
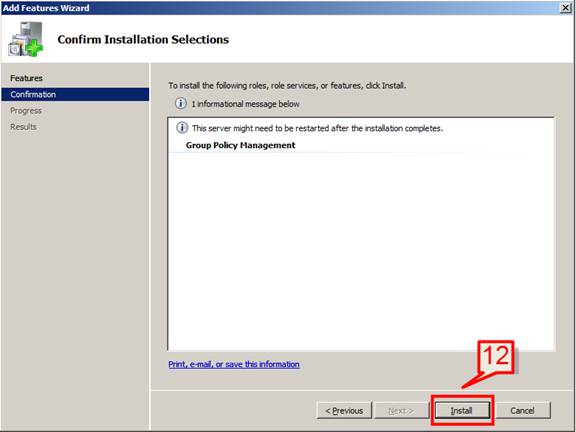
#12. Click Install to start installation of GPM
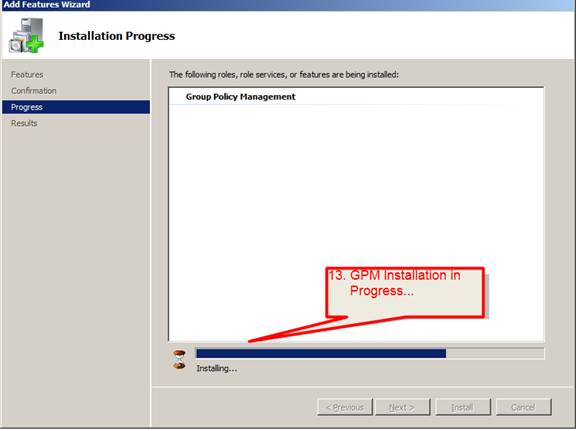
#13. Windows will then start installing GPM
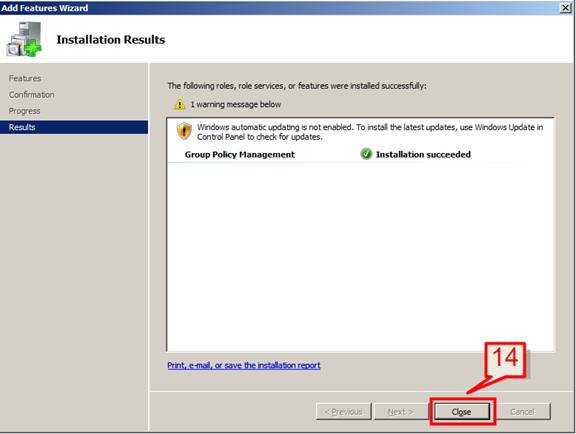
#14. Click Close once installation is completed
Now we will look at the GPMC console and will do some configuration.
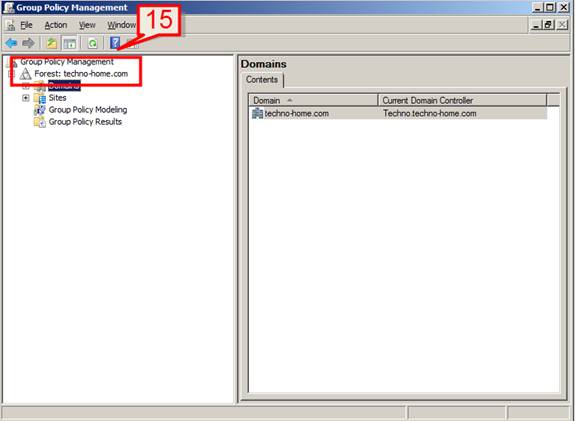
#15. Open Start -> Programs -> Administrative Tools -> Group Policy Management
GPMC console will open
We will check on how we can create a new GP object, edit an object, add an AD objects to GPMC, etc.
Create a Group Policy Object
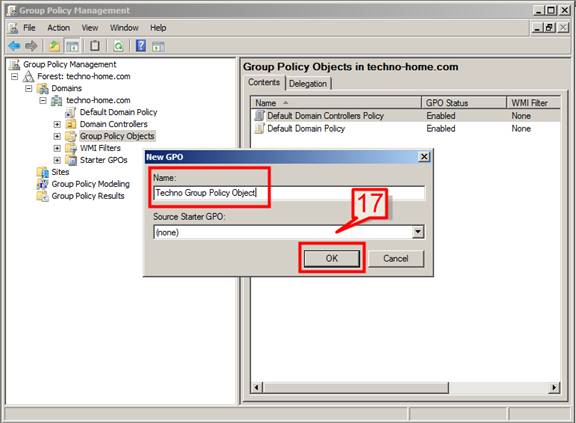
#16. Choose the forest or domain where you want to create the object; then, expand the tree and select Group Policy Editor -> right click -> and select New.
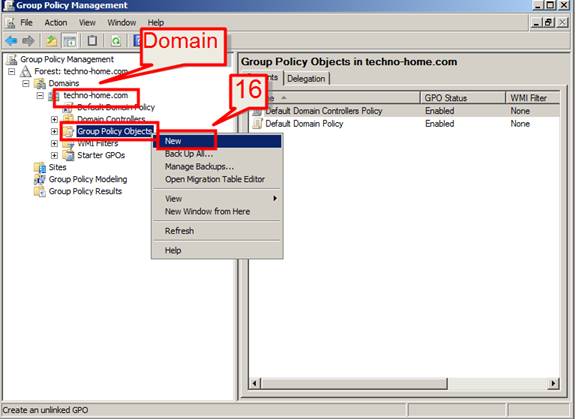
#17. Provide a name for the object, and click Ok.
Edit a GP object
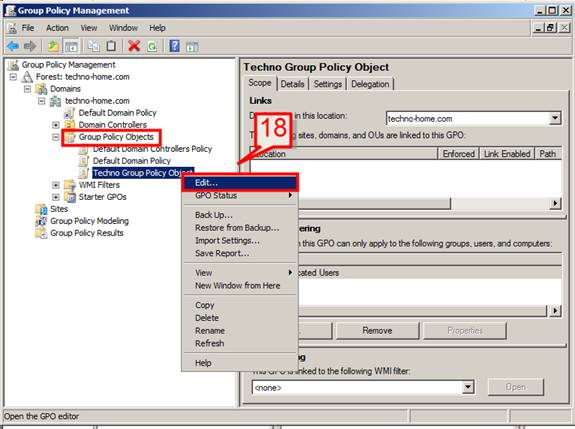
#18. Expand the Group Policy Objects and select the object where editing is needed.
Right-click on the object and select Edit.
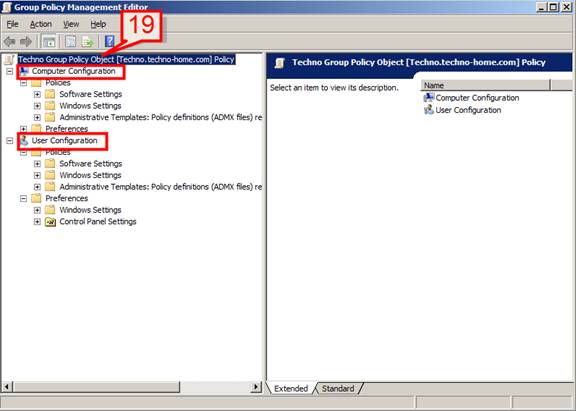
#19. On the GPM Editor console, edit the settings that you require. (The process is same as we discussed on editing a local group policy).
How to Delete a GPO
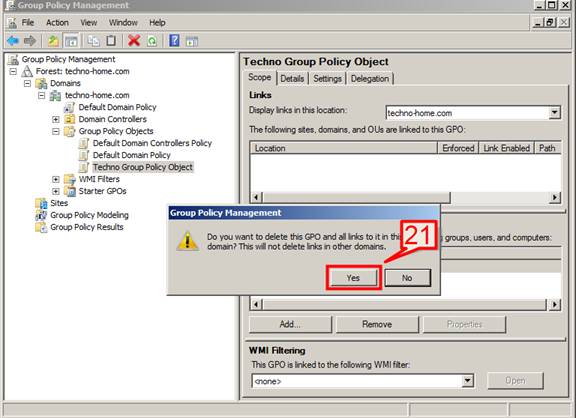
#20. Expand the Group Policy Objects and select the object where editing is needed.
Right-click on the object and select Delete.
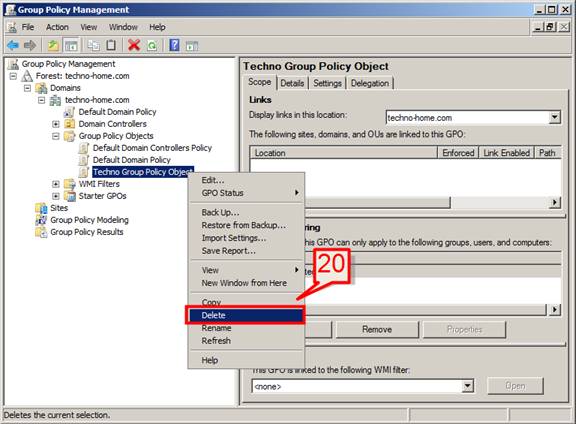
#21. Select Yes to delete the selected GPO
Add an AD object to GPMC console
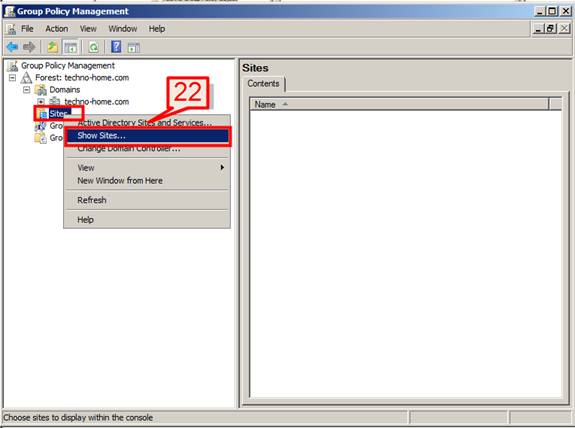
#22. To add a new site to GPMC:
Select the site on the forest to which it is related to.
Right-click on the site and select Show Sites.
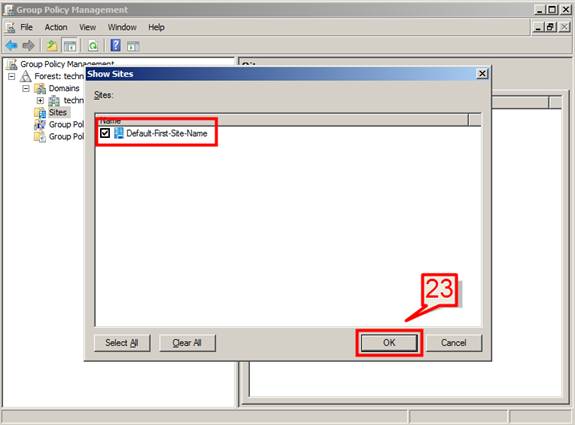
#23. Choose the site(s) which are going to be part of the console and click OK.
Note: The same process can be repeated to add forest or domain to the GPMC console.
How to delegate a GPO
#24. Choose the forest or domain where you want to delegate; expand the tree and select Group Policy Editor.
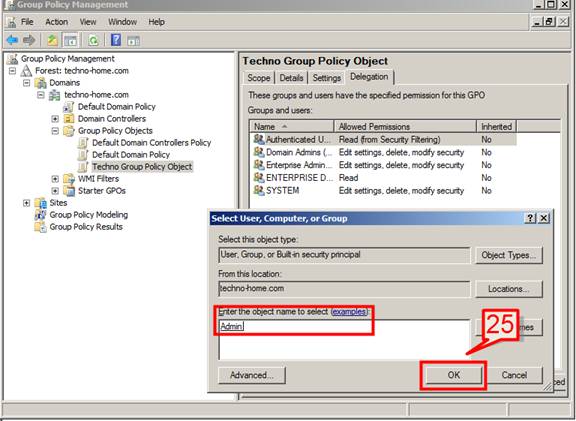
Select the GPO that needs to be delegated, and on the right pane console, select Delegation and click Add.
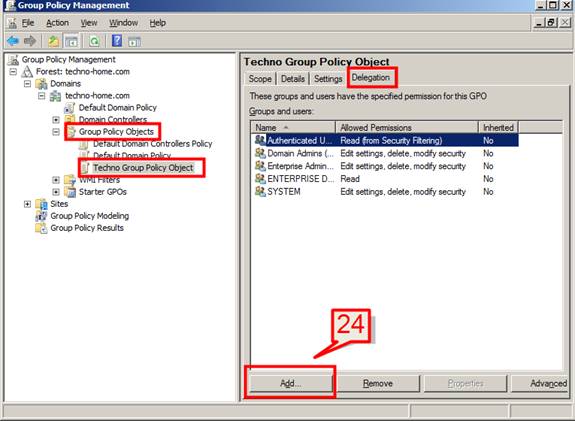
#25. Add the user, group or computer name to delegate the GPO and click OK.
Starter GPO
Starter GPO contains collective Administrative templates policy settings in a single object. Since these are sets of admin policy settings, they help an administrator import and export these settings to another environment.
Note: We also have System Starter GPOs which are unlike Starter GPOs in the sense that these are read-only GPOs, and are used to provide initial settings for certain situations.
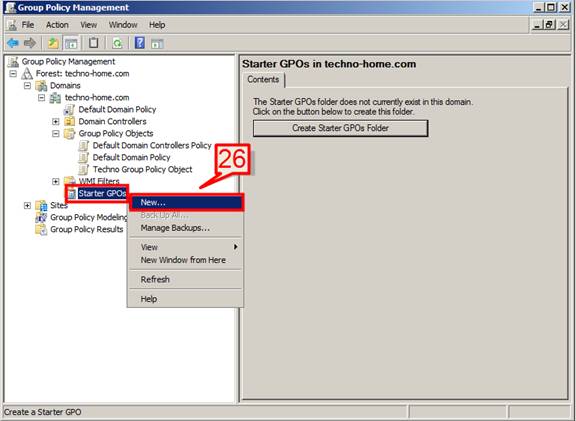
#26. To create a new starter GPO
Select Starter GPO -> Right click -> select new
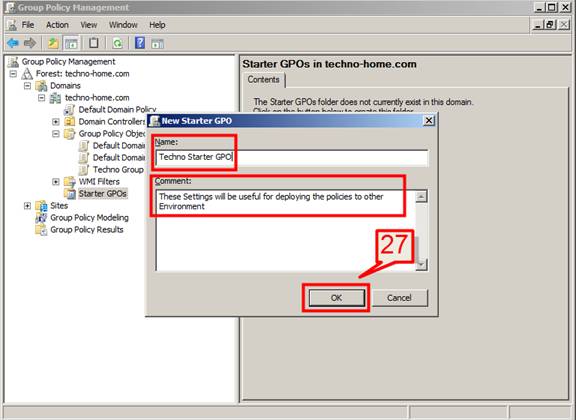
#27. Provide a name and comment on new starter GPO windows and click OK.
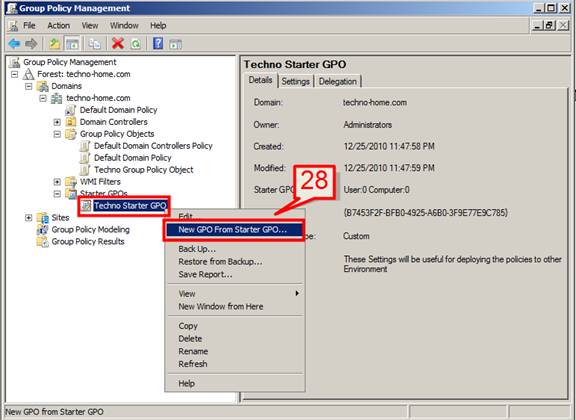
#28. Create a new GPO from the starter GPO
Select the starter GPO -> Right click -> select New GPO from Starter GPO
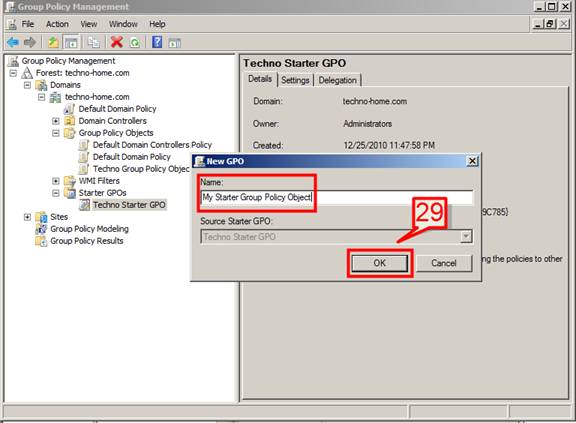
#29. Enter a name for the new GPO and click OK
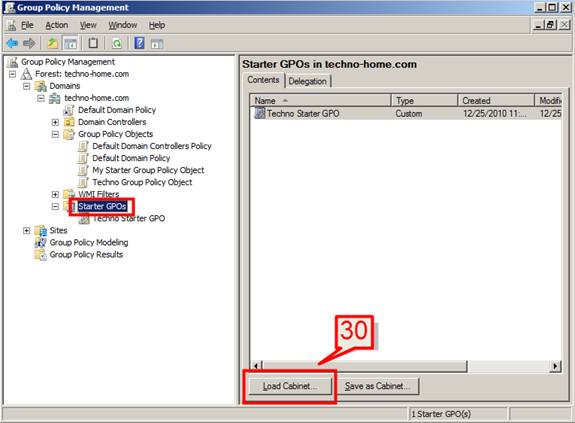
#30. How to import Starter GPO
Select the Starter GPO and on the right console, click Load Cabinet.
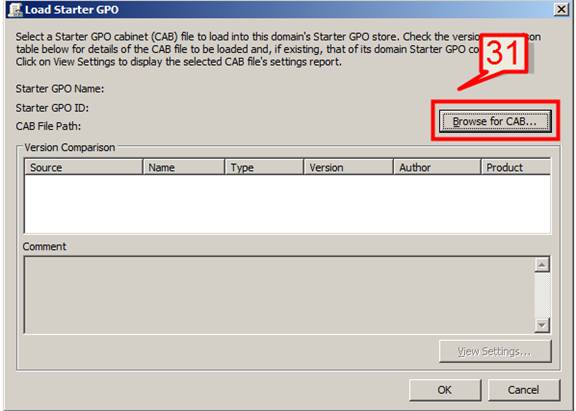
#31. Click Browse for CAB to find the CAB file
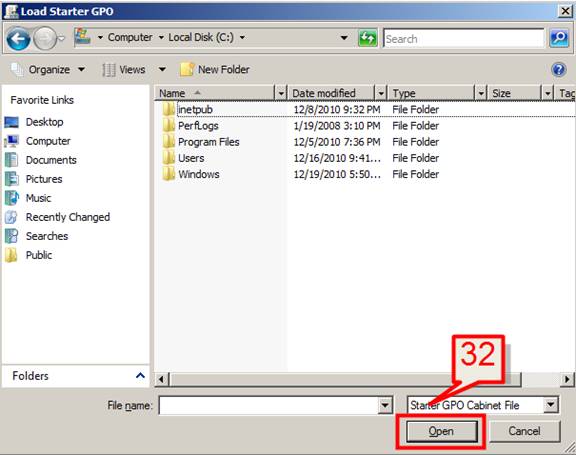
#32. Browse and select the cab file and click Open; then, click OK to import
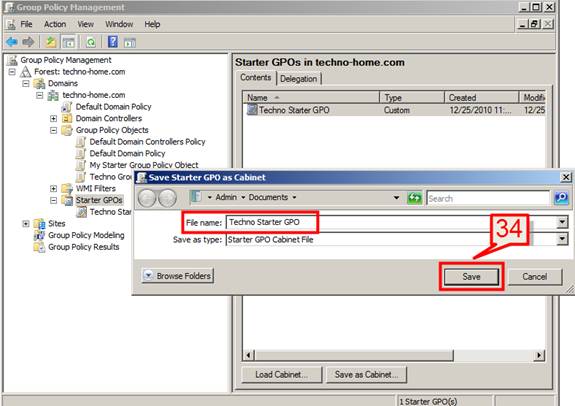
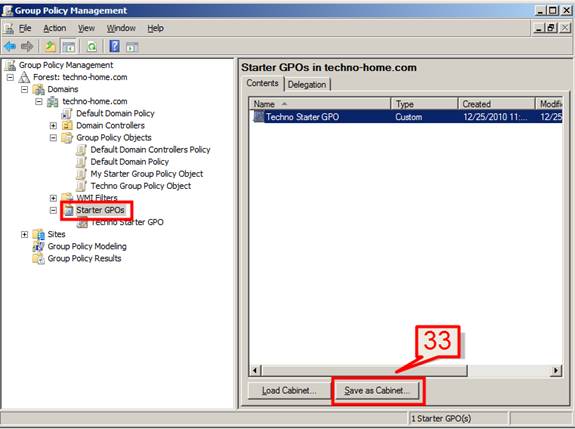
#33. How to Export a Starter GPO
Select the Starter GPO and on the right console, click Save as Cabinet.
#34. Type a file name and click Save
