Archive
Amazon Virtual Private Cloud
Amazon Private Virtual Cloud (VPC) is providing facility to use our individual resources which are isolated in the Amazon Cloud. Using Amazon Virtual Private Network (VPN) we can connect our resources to the isolated computer in the cloud. Amazon VPC integrated with Amazon EC2, Amazon Elastic Block Storage (EBS), and Cloud Watch. Amazon VPC provides security such as DNS, LDAP etc., reliable, scalable and cost effective.
- VPC is a remote section of cloud. We need to provide IP... Read more
Step by Step Installation of the Visual Studio 6
Visual studio 6 is a computer software that is used in creating and running programs written in visual basic, C and C++ languages. Visual studio installation has several steps that need to be followed in order to work properly. Below is the explanation with images made easy to understand for its installation. It should be noted that the icons with a red mark are the required fields to be filled during the entire installation process. 1. Run the set up of visual studio 6 software as shown below.Read more
Shared Folders and Local Users in Window 7
The option of shared folders in computer management console of window 7 has made it easy to access the remote resources and showing the remote activities on that system. It manages all file sharing and set permissions as well as mange all open files and users that are connected to share files. Shared folder has three main components. 1. Sessions 2. Open files 3. Shares Following are the steps to share a file : Step 1: To share a file user first must go to “Computer management “console by right click on Computer icon in start menu and... Read moreSoftware Package Creation and Distribution
Software package creation and distribution requires the following- Creating a package
- Distributing the package to distribution points
- Create the Programs for installation and uninstallation.
- Assigning the package to an collection
SCCM with R2 Installation
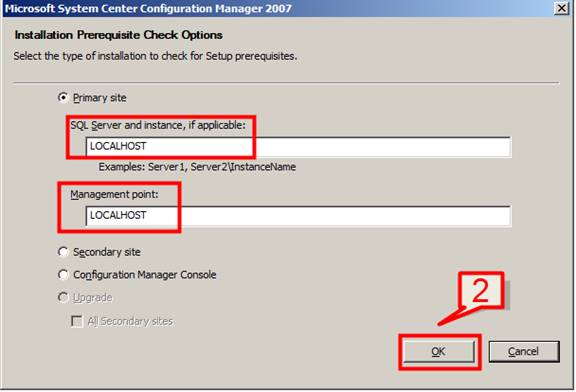
Now that we have configured all the required settings for SCCM, we will now install the SCCM setup. 1. Go to SCCM installer file and click the installer setup Once the installer dialog pop-up, select Run prerequisite checker. This is to check whether we have the entire configuration in place before running SCCM.
Extending the Active Directory Schema and System Management container
Extending the AD Active Directory (“AD”) Schema requires access rights to Schema admin groups. Schema and System Management (“SCCM”) installation and functionality such as Network Access Protection and global roaming require the AD schema to be extended. This action needs to be done once per forest.
Extending of schema can be done with the utility EXTADSCH.exe. This is present in SCCM installation setup files.
1. Browse for the location SMSSETUPBINI386 and locate the file EXTADSCH.exe
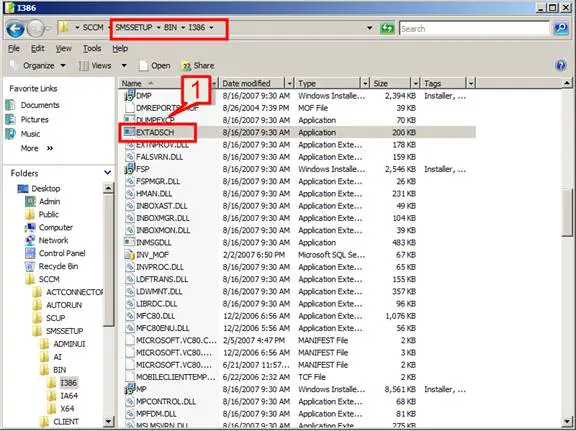 2. Run the executable. Once...
Installation and configuration of SQL Server – Part 7
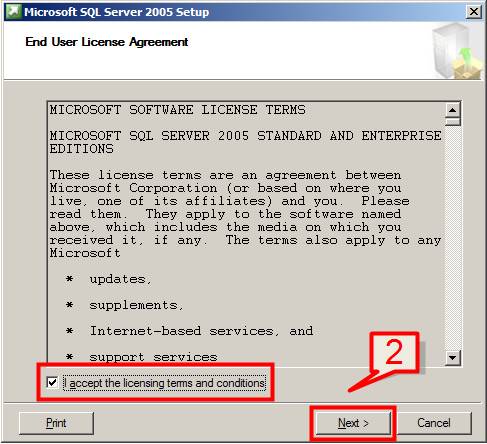
In this section we will cover SQL server SP2 installation. SCCM uses SQL server database for storing its data. To install SQL server follow the below steps 1. Double click on installer Seup.exe of SQL 2005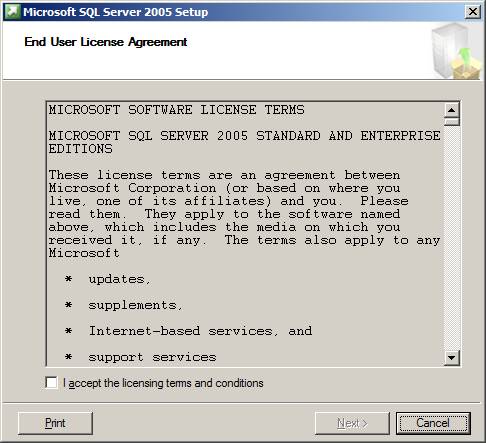
Read more
Installation of required Windows Features and Roles - Part 5
We need the below Windows roles and features as part of SCCM installation.- Windows Deployment Services (WDS)
- Installation of BITS Server Extension and Remote Differential Compression features.
- Installation and Configuration of WSUS Server and Report Viewer
- AD should be installed
- DHCP should be installed and configured.
- One of the volume need to be NTFS formatted.
Installation and Configuration of IIS - Part 4
Now that we have the AD is ready for the server with DNS and DHCP, the next step is to install and configure IIS Server. IIS is required for web based reports that SCCM support. To Install IIS please follow the below steps 1. Click on Start -> Administrative Tools -> Server Manager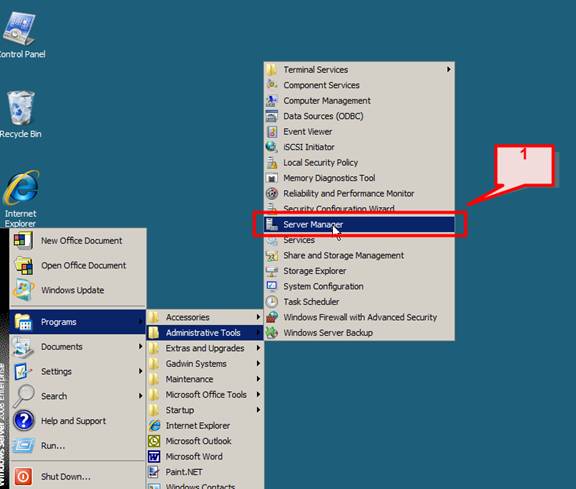
Read more
Active Directory Installation with DNS and DHCP Configuration - Part 3
Here, we will look at the System configuration required for SCCM. This will include Active Directory installation, DNS and DHCP installation and configuration. AD with DNS Installation To configure Windows 2008 server for use as a Domain Controller, follow these steps: 1. Click on Start > Run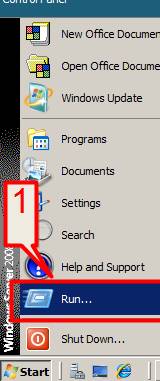

Latest Articles

How T-Mobile Postpaid Plans Improve 5G Connectivity And Mobile Value For Everyday Users

Skill-Based Slots Trend Or The Future Of The Industry
")
Top 7 Tech Features That Make Online Games Addictive (In A Good Way)
Latest Blogs

Top 10 New Laptop Entrants That Shook The Public

10 Facts About The Dark Web

Top 10 Latest Steam Cleaner Machines
Latest Tips

Top 10 Internet Monitoring Software

Top 10 Best Partition Manager Software
