Realtek HD Audio Manager Low Microphone Level Solution

Asked By 60 points N/A Posted on -
qa-featured

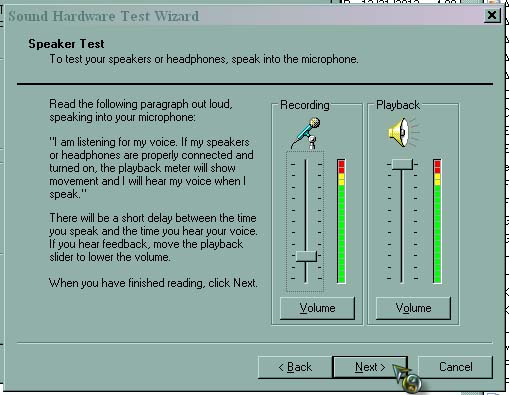
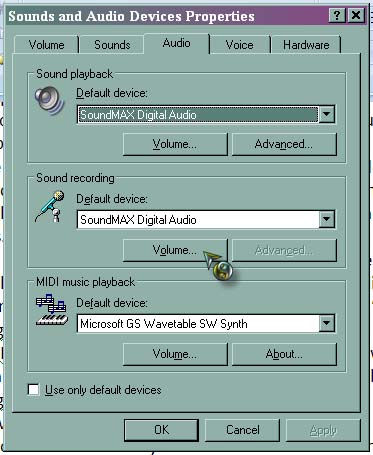
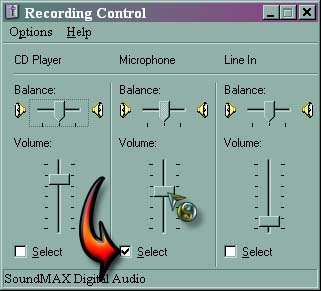
I recently bought a Lenovo laptop with Razer Carcharias headset. Few days after purchasing, I used the headset in Skype but my friend was unable to hear me. I checked on my headset and realized that the mic's 3.5mm jack where my headset was connected cannot pick any sounds from my microphone. I tried another headset to ensure that the issue is really from the headset itself or from my laptop, but the same issue occurred. I checked on the internet to fix this but I could not find any resolutions related to it. Can anyone help to solve this problem?

By the way, my laptop is running an Intel Core i7-4700MQ 2.4GHz/3.4MHz with Windows 8 64-bit. A Realtek Audio Card, NVIDIA 2x GeForce GT 750 SLI that comes with 4GB GDDR5 and a 1TB 5400rpm SATA.

SHARE
Answered By 590495 points N/A #188307

Realtek HD Audio Manager Low Microphone Level Solution

qa-featured

I don’t think either, that the headset is faulty since like what you said, you bought it together with the laptop and also you already tried a different headset and still the same. I think you haven’t configured the volume of the microphone in your headset in your computer that’s why you can’t hear anything or maybe even if the other person hears something it is too weak.

Since you are using Windows 8 and I’m running Windows XP, see if you can follow this procedure on your computer on how to test and configure the sound of the microphone. First, wear the headset on your head then connect the jacks to the computer and make sure both jacks are inserted on the correct ports.

Next, press Windows logo on the keyboard then type without quotes “control” in the Run dialog box then hit Enter. This should open the Control Panel. Click “Sounds, Speech, and Audio Devices” then “Sounds and Audio Devices”. Click Voice tab then hit “Test hardware”. See image.

Click Next on the next window. The computer will now check for the connected device. Wait for it to finish testing the hardware. When finished, you should see something like this. See image.

Follow the instruction on the window then click Next when done. Your next screen is similar to the previous one but the Playback is now enabled. See image.

Again, follow the instruction on the screen, click Next then Finished. After this, you are now sure that the microphone on your headset is working. You may now adjust the volume of the microphone. Go back to “Sounds and Audio Devices”, select Audio tab then click Volume under “Sound recording”. See image.

Check Select under Microphone then adjust the slider either up or down for the microphone’s volume. Just close the rest of the windows when done. See image.

Related Questions