Problem in removing File History data sucessfully

Asked By 10 points N/A Posted on -
qa-featured

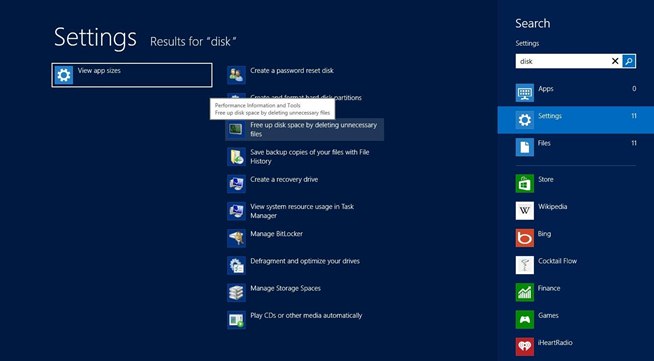
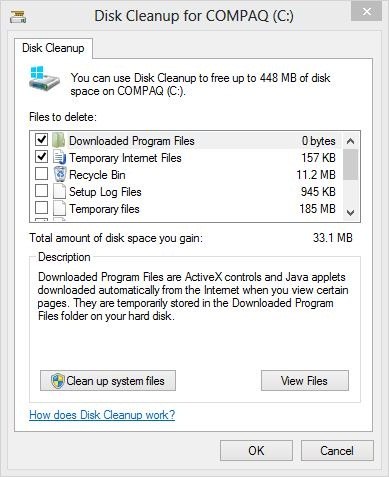
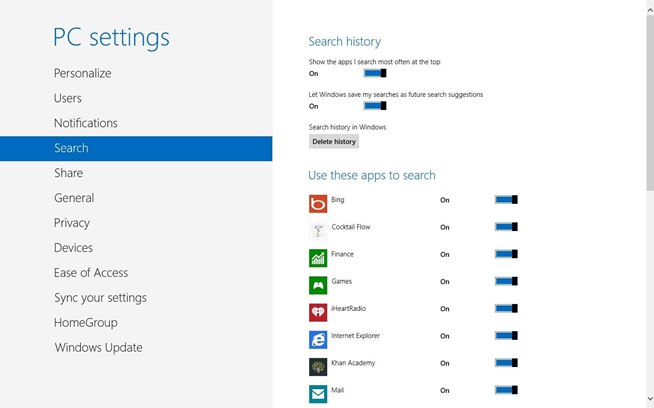
I am trying to clean up all the file history contents in Windows 8. I had done this earlier safely without any errors. Is there any reason for not completing the function in windows 8? How to avoid errors in and complete the File History removal successfully?
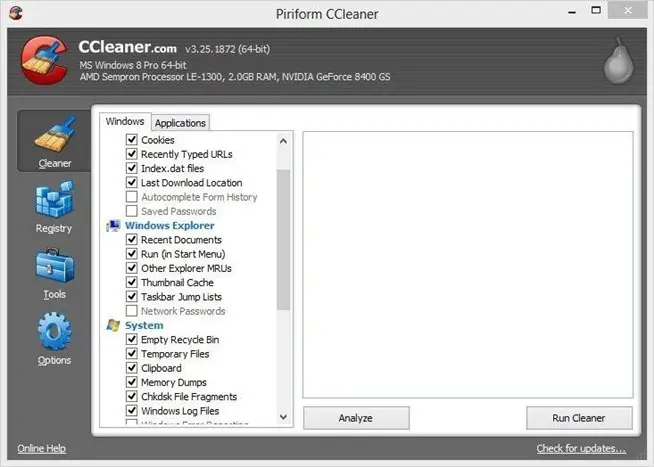
I have rebooted the PC many a times but the problem still persists. Will event log help in this case? How to access event log? Is it possible to clear in case, a few of them using any other tools? Thank you for your help.

SHARE
Answered By 0 points N/A #194369

Problem in removing File History data sucessfully

qa-featured

Hello Carl,

Deleting or cleaning up every file history contents in Windows 8 to free up space to help your computer to run smoother and faster is a dream come true for everyone. However, deleting those temporary files can be very tricky and it should be done with care. Note that Windows 8 is running on two separate computing environs namely; the new Start Screen/Metro UI and the regular desktop at a go making it quite tedious clearing quite several caches.

Here are few steps to guide you through:

            First, start by deleting or cleaning up the basic temporary files by keying in the word disk in the Start Screen.

Click on the Disk Cleanup after locating an option with the inscription free up disk space by deleting unnecessary files beneath the setting tab.

Select the temporary files to be deleted and note that after this action, you ought to clear up the other of Metro applications own caches.

            Deleting the Internet Explorer History is the next step. Note that the Metro version of the Internet Explorer is entirely different browser from the Desktop version.

  • Open the Start Screen version of IE10 to delete the cache
  • With a simultaneous action, press on the Windows key and key C (alphabet) to access the Charms Bar
  • The IE10 should be open in the very window enabling the Internet Options to be visible. Note that without these steps you can access the very Internet Options menu.
  • After opening the Internet Options menu, look for Delete Browsing History at the very top of the menu and click on it to delete.

           The third Step is to delete the Windows Store’s cache by pressing the Windows Key plus R key simultaneously to open and run. Key in WSReset and click on OK. The Windows Store application will open spontaneously and with a successful action a screen confirming the completion of deleting cache.

            The fourth Step is clearing the Windows Search History. Most users prefer to use the search function feature in Windows 8 in their daily search for apps, files, documents and so forth. This creates temporary files which serve as guide for the computer to notice and prioritise your search based on your passed search. It is therefore necessary to clear these files as time goes on.

  • Open the Charms Bar and click on the PC Settings.
  • Look for the Search History from the top after clicking on the search tab.
  • Click on the option Delete history to delete the search history. Bear in mind to delete every caches in other browsers too. You can also download the CCleaner app to do this job of clearing all the browsers’ cache instantaneously. But remember to save the IE10 app.


           The last stage which is the fifth step is to delete the Live Tile Cache. This action is important because occasionally after clearing or deleting a picture for instance on the Live Tile on the Start Screen, it still appears again because of the cache version.

  • Press simultaneously on the Windows key and key C to access the Charms Bar
  • Select Settings and click on Tiles
  • Click on the Clear button beneath the clear personal info from my tiles prompt

With these outlined steps you should have a safe and successful task executed.

Thank you.

Brenda Cruise

Related Questions