
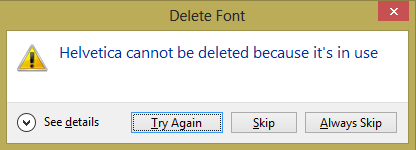
I need to delete helvetica font for windows, but I keep getting a message that the font is in use at the moment. How do I remove it?
Delete Helvetica Font For Windows Forever
Follow these steps to delete the font.
- Traverse to this path “C\Windows\Fonts\.”
- Search for the font to be deleted, Helvetica in this case.
- Right click on the properties.
- Copy the file name for this font, as you are going to need that.
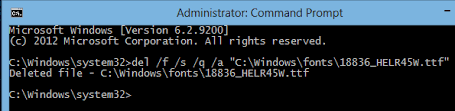
- Open the command prompt with administrative privileges, and type in the code shown in the image.
- This will delete all its related directories.
Delete Helvetica Font For Windows Forever
There are different ways to delete a font on your computer. One is to simply select it then delete it. On Windows 10, press the Windows key + E to open File Explorer then navigate to:
C:\Windows\Fonts
Next, locate the font you want to remove, select it then click “Delete” or hit the “Delete” button on your keyboard. Another way is to uninstall it. On Windows 10, click “Start”, “Settings” then select “Personalization”. Next, select “Fonts” on the left pane then select the font you want to remove on the right.
If the font you selected is a font family that has more than one font face, select the font face you want to remove from the dropdown list then click “Uninstall”. Select “Uninstall” when you are prompted.
Now, when you receive an error that the font is in use when you try to delete it though it is actually not in use, this will prevent you from deleting the font. If this happens, first thing to do is check if you have other applications running then close them or just restart the computer then don’t open any applications after booting.
Next, click “Start”, “Control Panel” then “Fonts”. Click “Organise” then point to “Layout” then select “Details pane” to uncheck it (if it is checked). After this, try deleting the font again. If this doesn’t work, press the Windows key + R to open the “Run” dialog then type without quotes “regedit” then hit Enter. In the “Registry Editor” window, navigate to the following location:
HKEY_LOCAL_MACHINE\SOFTWARE\Microsoft\WindowsNT\CurrentVersion\Fonts
Now, on the right, locate the affected font file name and delete it. When you are finished, exit the Registry Editor then go back to the System Fonts folder and refresh it. The affected font should now be removed. Note: the Registry Editor should only be used by system administrators or users with admin accounts.


