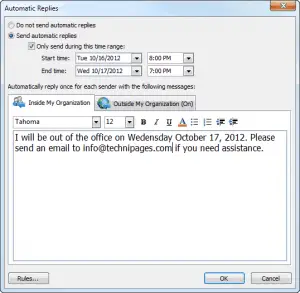
Activating Out Of Office Assistance 2010 In Microsoft Outlook
Asked By
0 points
N/A
Posted on - 11/29/2017

I’m trying to activate out of office assistance 2010 in Outlook. How do I do it? What is the use of activating it?


