
Installation and Configuration of Network Card in Windows 7
In this article, we will install a network card in Windows 7 and configure the network card. If you want to add your computer to a network or any network device, you need to install or configure the network card. Nowadays, every new computer you buy has a built-in network port..
But if you have an old computer which does not have a built-in network card, you have to install a PCI or a USB network card. But here, we are starting from the beginning; assuming that we do not have a network card installed in our system. If you do not have it installed in your system, then follow the procedure from step one. But if you already have a network card, then skip the first three steps and follow the procedure from step four.
Step 1:
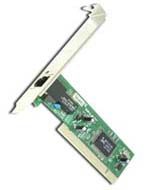
As we mentioned above, we can connect the network card through a PCI or it could be through a USB network adapter. If you are installing the PCI network card, then simply open your computer case and put the PCI network card into an empty PCI network card slot. But if you want to connect through a USB network adapter, you just simply plug it to any USB port.
PCI Network Card USB Network Adapter
.jpg)
Step 2:
Now you have to install the driver for the network card. In most cases, Windows will automatically detect that you have installed a new hardware and install the driver automatically. If your Windows is not installing the driver automatically, then you have to install the driver manually from the CD supplied with the network card.
Step 3:
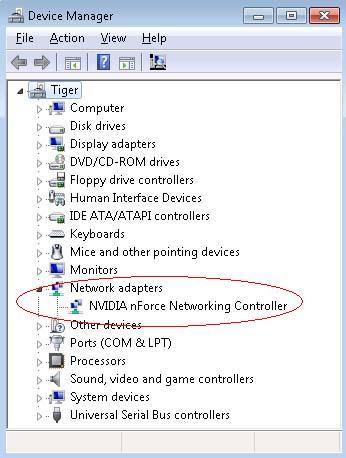
After your network card has been installed successfully, you will see the network card listed under the Windows Device Manager. If you want to go to Device Manager, click Start, then go to Control Panel, and click on System and Security, and then click on Device Manager. You can see the network card listed under Device Manager in the image given below
Step 4:
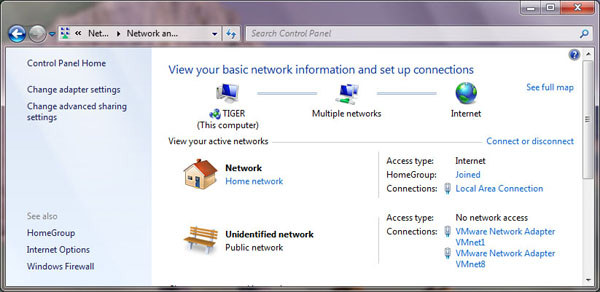
Now go to Network Sharing Center by clicking on Start, then go to Control Panel, and click on Network and Internet, and finally, click on Network and Sharing Center. Now here you will see that you computer is connected to a network and has access to the Internet. This indicates that our network card is installed properly and is ready to get a connection from our network.
Step 5:
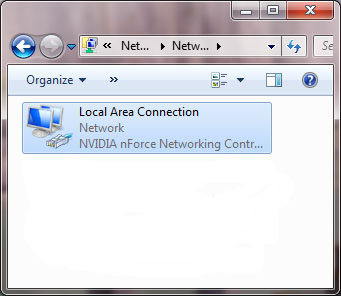
Now check your Local Area Connections by clicking on the Change Adapter Settings link appearing on the left side of Network and Sharing Center, as shown in the image given below.
Step 6:
Now after step five, double-click on the Local Area Connection icon, which will display your LAN status. It shows all the detail of your network connections, such as duration of network connection, speed of the connection, and the number of bytes sent and received as you can see the image given below.

Step 7:
Now click on Details to see the network connection details. As from the image given below, you can see that the red highlighted area is showing your DHCP as set to yes, and it also shows your IP address. Here, take note of the dynamic IP address, and when you reboot your system or router, that IP will change automatically.

That’s it. Your Network card is installed and you have learned how to install and configure the network card.


")


