
Hello,
I have installed Mac OS X and the Cisco VPN client pops up an error when I launch it. I would like to see your suggestions about this error before I decide on what to do. Please keep in mind that am new to the Mac world.

Error 51: Unable to communicate with VPN subsystem.
Please make sure that you have at least one network interface that is currently active and has an IP address and start this application again.
How to fix the Cisco VPN Client error 51 on OSX
Other Mac users are also having the same problem. The error sometimes happens after upgrading Mac OS X to Lion. I’m not sure if it’s the same with upgrading the operating system but in Microsoft Windows, after finishing the upgrade let’s say from Windows XP to Windows 7, it is mandatory to reinstall all programs to activate them on the new operating system.
If you have lots of programs installed then it sure is a big job. Since you just finished upgrading to Mac OS X Lion, try first reinstalling CiscoVPN Client. Uninstall CiscoVPN client, restart your computer, and then install Cisco VPN client again. See if this work around works. If it doesn’t, try this other method.
According to a website, the proprietary CiscoVPN Mac OS X client is kind of buggy although it is verified that the native CiscoVPN works on Mac OS X 10.8 Mountain Lion. On the other hand, you can use the IPSec VPN application that comes with Mac OS X. You need to migrate from CiscoVPN to the local Mac OS X IPSec VPN.
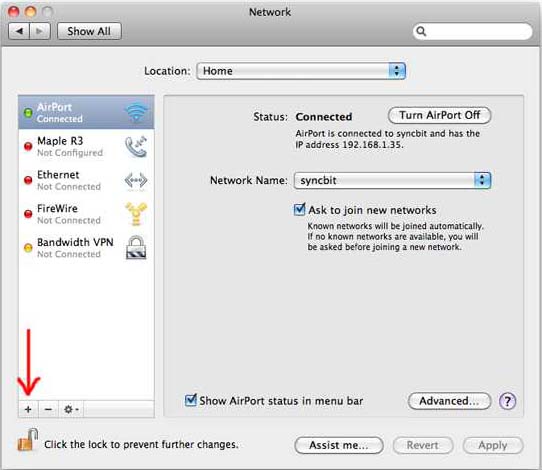
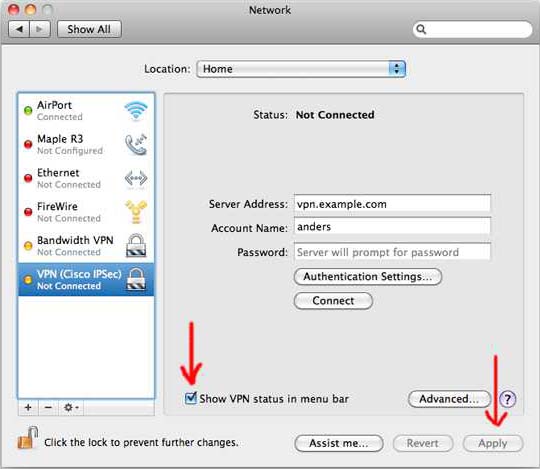
This is done by decrypting the passwords stored in CiscoVPN PCF files. In your Mac OS X, open System Preferences then select Network. Create a new connection by hitting on the plus “+” button at the bottom of the window. See image.
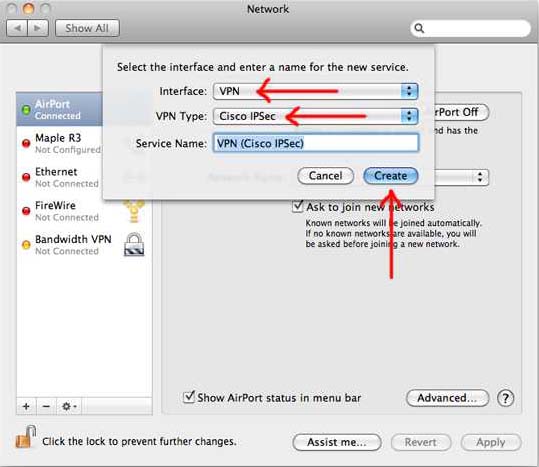
In Interface, select VPN and for VPN Type, select Cisco IPSec. For the Service Name, you can specify any name you want. See image.
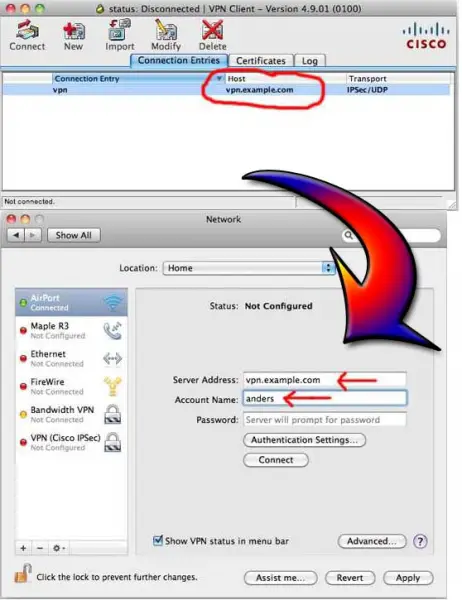
Copy the CiscoVPN Host address into the Server Address of the System Preferences. In Account Name, enter your username. See image.
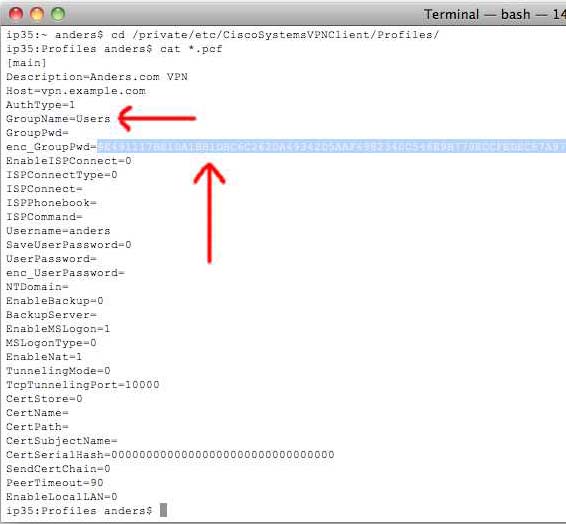
Next is to find your PCF file. In Mac OS X, you can usually find it in “/private/etc/CiscoSystemsVPNClient/Profiles”. To access this location, go to Applications then Terminal. After that, type the following:
-
cd /private/etc/CiscoSystemsVPNClient/Profiles
-
cat *.pcf
After running these commands, you should get something like this. See image.
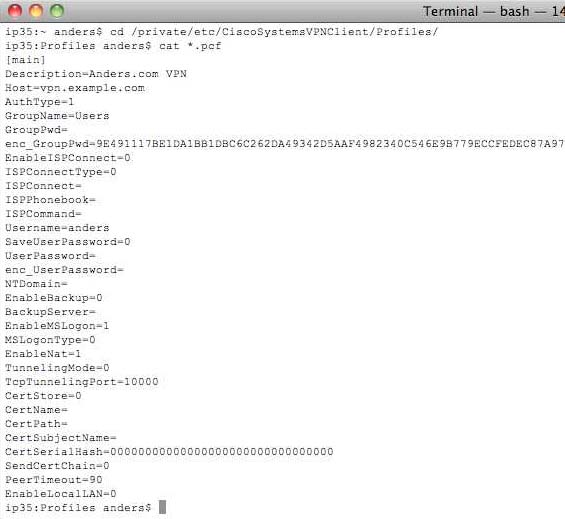
Find “enc_GroupPwd=” and copy the code next to it. You should also make note of the “GroupName”. See image.
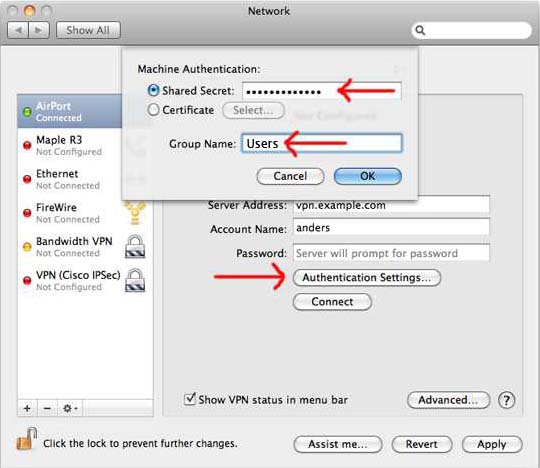
Next, visit CiscoVPN client password decoder, paste the copied password in the field, and then click Decode. You may also go to Native CiscoVPN on Mac OS X then go down to number 6 to decrypt the password. Go back to Network Preferences and click on Authentication Settings.
Enter the decrypted password in Shared Secret and set the same group name from GroupName above. Click OK. See image.
Make sure “Show VPN status in menu bar” is checked. Click Apply afterwards. See image.
Try connecting to your new VPN connection by clicking on the VPN icon at the top of the screen. See image.
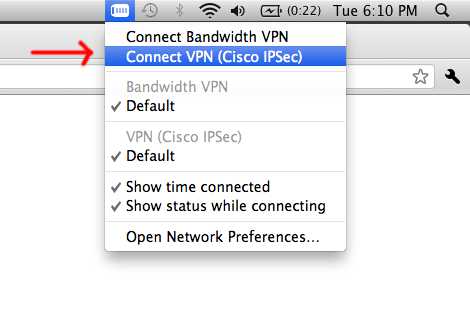
If the new connection works, you should see your connection time counting up at the top of the screen. See image.


