I Installed Fallout 76 But I Receive “Fallout 76: Could Not Successfully Complete First-time Setup. Please Try Again” When Launching The Game

Asked By 0 points N/A Posted on -
qa-featured

I wanted to play Fallout 76 since its release date that’s why I downloaded the client. I also checked the system requirements and made sure my machine meets those requirements. I also verified that I’m using a 64-bit operating system because I know the game will not run on 32-bit platforms.

Fallout 76: Could not successfully complete first-time setup

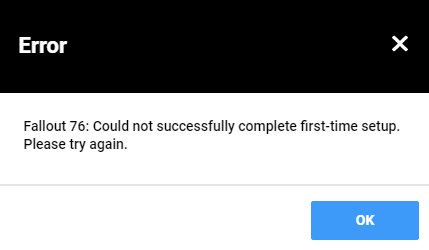
The game client installed without a problem. The problem came when I started the game after the installation. I receive “Fallout 76: Could not successfully complete first-time setup. Please try again”. How to fix this?

SHARE
Answered By 590495 points N/A #316870

I Installed Fallout 76 But I Receive “Fallout 76: Could Not Successfully Complete First-time Setup. Please Try Again” When Launching The Game

qa-featured

According to Bethesda.net, they are still investigating reports of players getting this error when starting Fallout 76. If you receive “Fallout 76: Could not successfully complete first-time setup. Please try again” on starting Fallout 76, try using the Bethesda.net Launcher Repair Tool. The tool checks the game launcher for any missing or corrupt files. Start the Bethesda.net Launcher then click the menu icon on the top left corner.

Bethesda.net Launcher Repair Tool

Go to “Help”, “Diagnostics”, then click the “Run” button for “Launcher Repair Tool”. When the repair is complete, the tool will call out what files were corrupted or missing and needing to be replaced and then tries to fix the launcher. If this doesn’t work, set the files “BethesdaNetLauncher.exe” and “BethesdaNetUpdater.exe” to run as admin. Open Windows Explorer then navigate to “C:\Program Files (x86)\Bethesda.net Launcher”.

Locate the “BethesdaNetLauncher.exe” file, right-click it, and select “Properties”. In the “Properties” window, go to “Compatibility” tab then under “Privilege Level” section at the bottom, check “Run this program as an administrator” then click “OK”. Repeat this on the “BethesdaNetUpdater.exe” file. After this, expand the apps on your system tray then right-click the Bethesda.net Launcher and select “Quit”. Now, start the Bethesda.net Launcher again.

If this doesn’t work, uninstall and reinstall the game launcher. Download the free version of Revo Uninstaller and install it. Once installed, start Revo then select the Bethesda.net Launcher among the applications and click “Uninstall”. Follow the normal uninstall process. When uninstall is complete, click “Scan” to scan your computer for any leftover files and delete everything it finds.

This removes everything the program created on your computer. When it is finished, close Revo then install the Bethesda.net Launcher back. Once the game launcher is installed, start the game launcher then click “Game Options” and then select “Check for Updates”. Install any available update.

Related Questions