How to add or place an image into the general tab in my system?
Some client brought me the computer but I am not able to get the instructions on how to a put a picture in the system.
Please suggest some tips.
I want to use my official logo in my system in the general tab.
How to put a picture in system ?

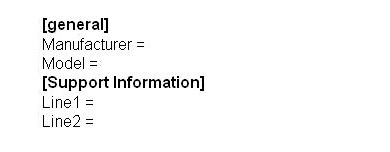
To put a picture on the General Tab of your Computer System, navigate to C:WINDOWSSYSTEM32 folder. Locate the oeminfo.ini and double-click to launch it. It will look like this:

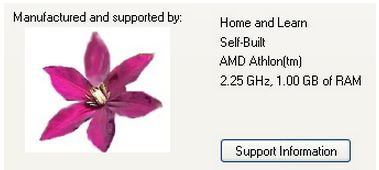
Just type the required information on the general and support information. If you will enter information on Line 1 only, the Support Information button will not be available. But if you enter information on Line 1 and Line 2 then you can see all the information you typed when you click on the Support Information button. You need to have an image that is no larger than 180 pixels on width and 114 pixels in height then save your image as oemlogo.bmp. Once you have your image, copy and paste it in the C:WINDOWSSYSTEM32 folder.

How to put a picture in system ?

If you want to put your picture or an image in the System Properties, that would be easy if you are using Windows XP. Here’s how to do it. To put an image in the System Properties, you need two files: oeminfo.ini and oemlogo.bmp. You cannot just have the image file because it will not work. The other file, oeminfo.ini, must exist for the image to appear.
First, prepare the picture or image that you’re going to use. The image has to be 180 x 120 pixels maximum size, 256 colors, must be around 23k in size, and saved in BMP format (.bmp). Once you have the image in this format, rename it to without quotes “oemlogo.bmp”. Next, you need to create the “oeminfo.ini” file. Open Microsoft Notepad and enter the following:
[General]
Manufacturer=text
Model=text
[Support Information]
line1=”text”
line2=”text”
Replace without quotes “text” with the text you want to display. Under “[Support Information]”, make sure the texts are enclosed in quotation marks. You can have as many lines as you want. Just label it correctly and in correct order like for example without quotes “line3”, “line4”, “line5”, and so on. When you are finished, save the file and name it without quotes “oeminfo.ini”.
Next, copy the “oeminfo.ini” and “oemlogo.bmp” files to “C:\WINDOWS\system32”. Once both files are in there, right-click “My Computer” and select “Properties” to see how it looks. And that’s it.


