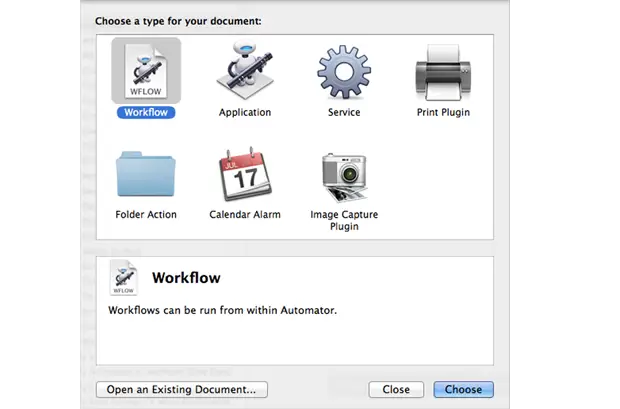
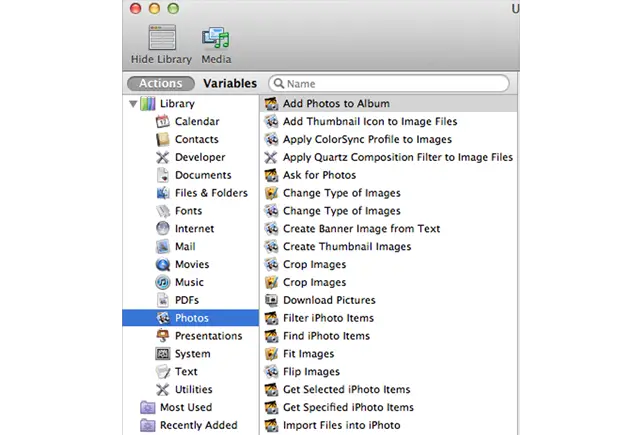
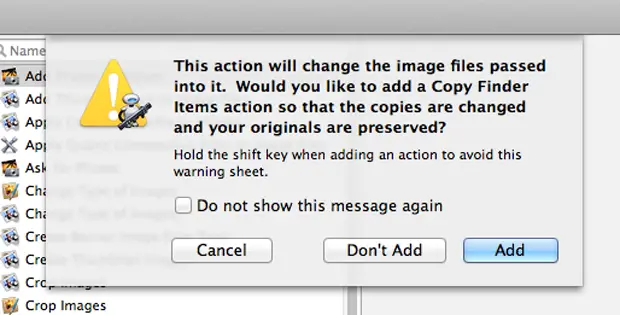
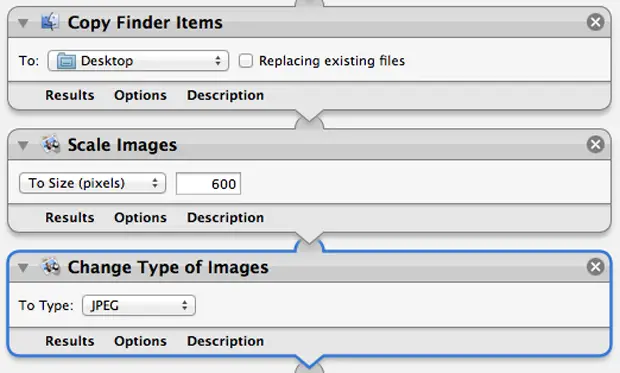
How to Batch Convert Photos Using Automator in Mac?
Asked By
10 points
N/A
Posted on - 11/08/2013

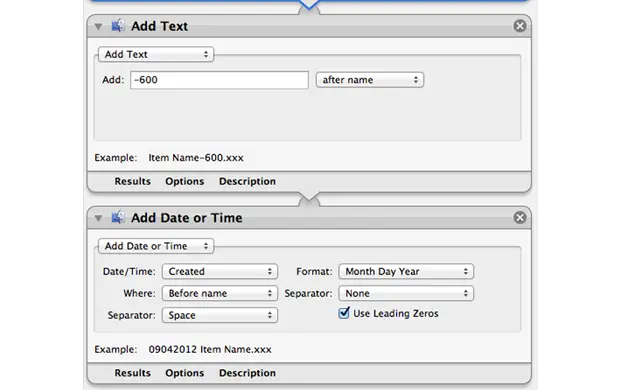
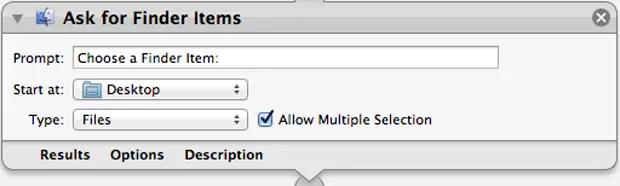
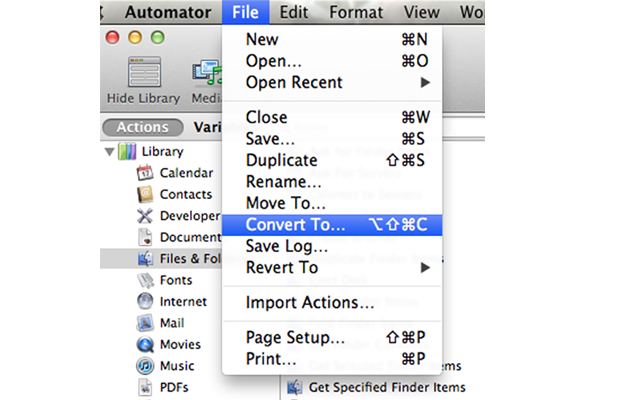
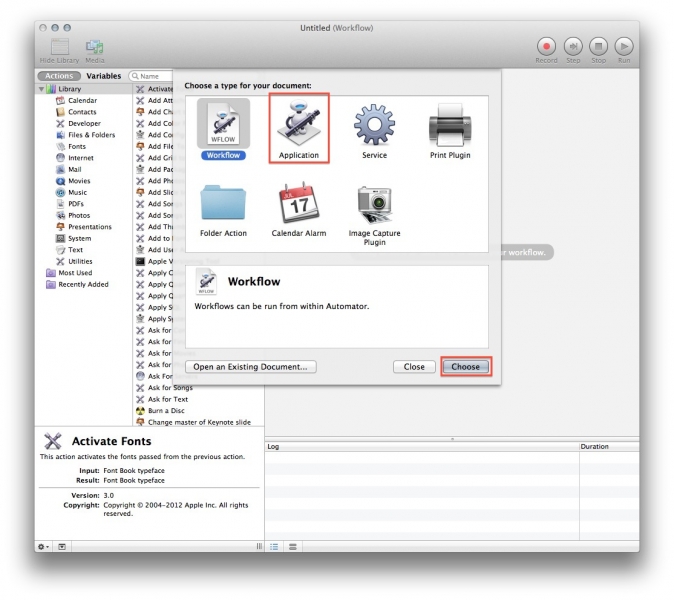
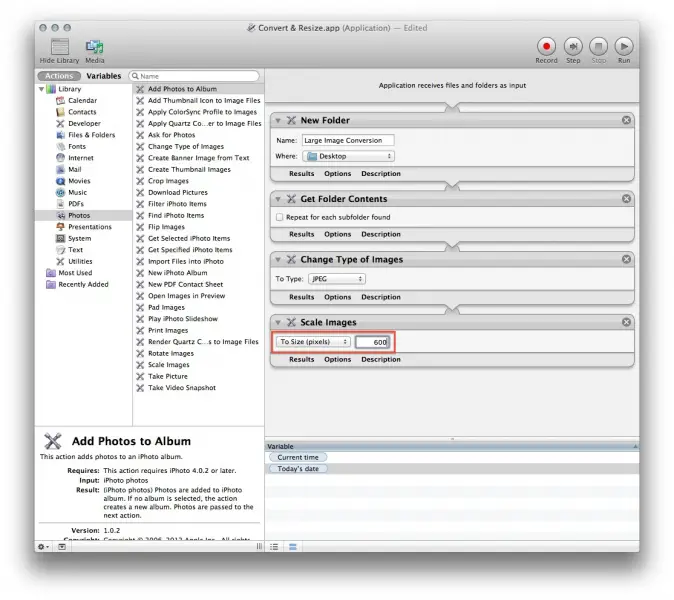
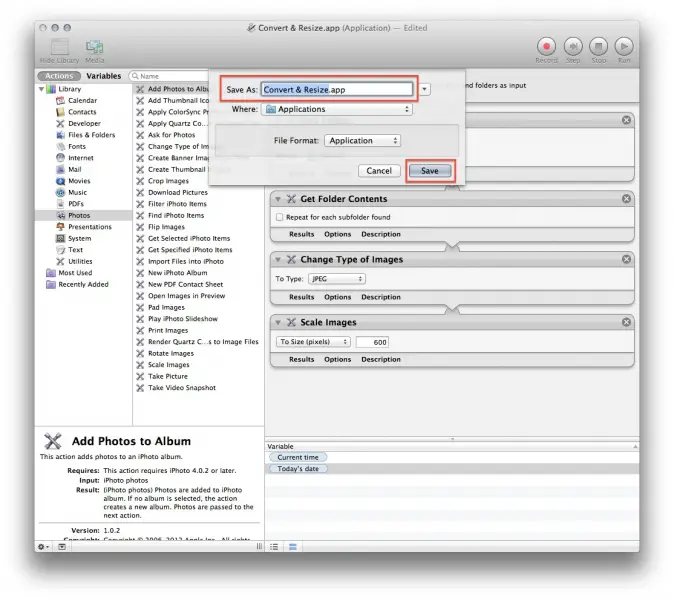
I want to use my photos as a background in Mac. I want to know how to batch convert those photos using the Automator. What are the steps? And please give me the link to download Automator. I'm running Mac Leopard. Thank you.

")


