Upgrading Microsoft Office 2010 To 2013


Users who are using office 2010 either in Windows 7 or 8 can either upgrade to Office 2013, or they can download office 2013 alongside with the older version. To update your version of office 2010 to office 2013 simply follow the steps shown below.
Before going for the steps to upgrade office 2010, please note that Office 2013 only runs with Windows 7 and Windows 8 operating systems and it isn’t compatible with Windows XP and Vista. Also while upgrading you should keep in mind that you can’t upgrade from 32-bit to 64-bit and vice versa. Please stick to your system bit version that is either 32 –bit or 64-bit version.
NOTE: Office 2010 automatically will be remove from your PC or laptop after upgrading Office 2013.
Step 1: Starting with the first you need to download your copy of Office 2013 ISO file. After downloading ISO file, you need to mount ISO to run the setup. If you are using Windows 8 it is easier, just right click on it and run with windows explorer
And it will automatically be mounted. If you are a user of Windows 7, follow the steps mentioned here to mount ISO file.
To mount your ISO file for Windows 7, you need to burn your ISO file to CD/DVD, in case you do not want to burn your ISO file to CD/DVD use third party tool Virtual Clone driver to easily mount your ISO file. Virtual Clone driver is freely available and easy to use ISO mounting software.
-Download any virtual clone driver software from internet and install it.
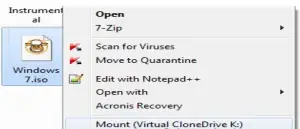
-Right- click on the ISO file you want to mount and click mount.
-You will see the new virtual driver in the Explorer.
For example, you want to mount the ISO file of your new Microsoft Office 2013, navigate to the folder having the ISO file and right click on ISO file.
You will see an option to mount your ISO file in the pop-up menu. Notice that the letter provided to your virtual drive with the option for easy locating the virtual drive.

Now open windows explorer and open the virtual driver to read the contents of ISO file. You can perform copy and all other operations on it now.
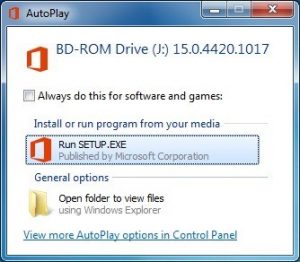
Step 2: If you have successfully mounted your ISO file, double-click on the setup file of your ISO file and click yes for the UAC prompt.

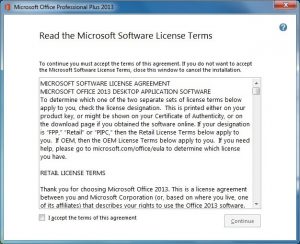
Step 3: After this do check I accept the terms of this agreement check box.

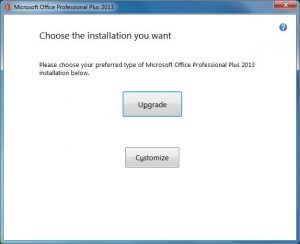
Step 4: In the screen you get next click on the upgrade button to automatically remove the existing office version and install the new version. You are done!!! Now you can enjoy your all new Office 2013.

Once you have installed Microsoft Office 2013 successfully upon opening it for the first time, you will be asked to activate your version. This is all about how to upgrade Office 2010 to 2013.
