
Hi,
I am using Smb4k version 1.1 but getting the following error message when I try to add Smb4K to my Autostart list in System Settings. This message displays using this version of the software. I have installed the latest version but can’t fix this issue. Please provide some suggestions. Thanks in advance.
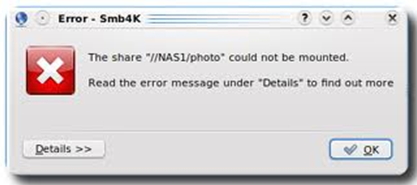
Error Smb4k
The share “//NASI1/photo” could not be mounted
Read the error Message under “Details” to find out more
An error occurred using Smb4k
If you are thinking that it is an error within the program or some kind of internal error because you are already using the latest version, I think that’s wrong. I think the version 1.1 you have right now is only an upgrade to your previous version because the program already includes a share which is only possible if you are already using it before and created shares.
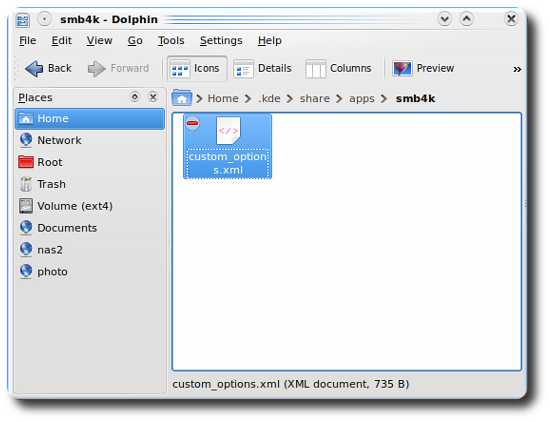
In your case, opening the graphical user interface will still not help because the program somewhat got stuck in opening or mounting the share. To fix this problem you need to delete the share. Open Dolphin or the file manager for KDE and go to “/home/.kde/share/apps/smb4k”. You can find this folder in your user ID.
Take note that files and folders that begin with "." are set as hidden and you won’t be able to see them. So to view hidden files and folders, click View then select Show Hidden Files. You will find the configuration file custom_options.xml inside the “smb4k” folder and this file contains the mounted shares. See image.
Before going to the file make sure Smb4k is not running or else it will only overwrite the file. Exit Smb4k if it is running. Click on the XML file and it will open up with Konqueror. Use its built-in editor to make changes to the file. See image.
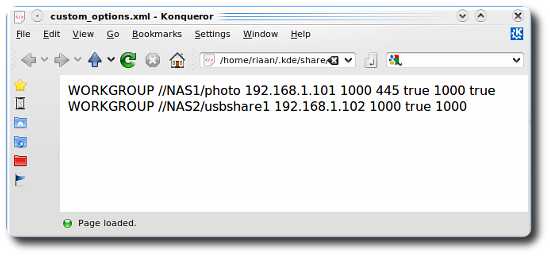
To start the built-in editor of Konqueror, click View, View Mode, Embedded Advanced Text Editor. See image.

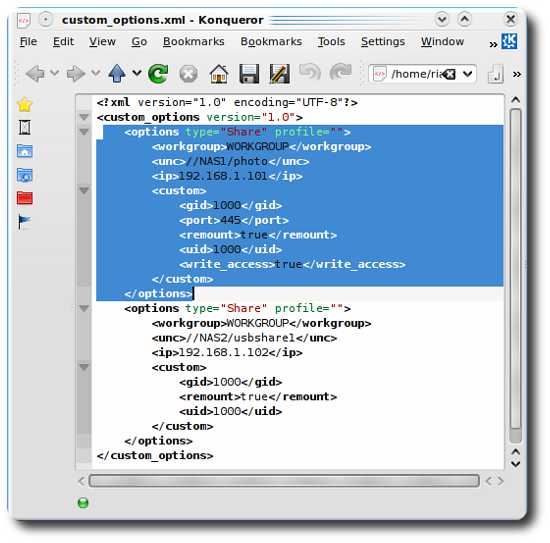
You can find the share definition enclosed within the options tag. You need to delete the NAS1 share. Click and drag with your mouse to highlight the whole first options tag. Next, click Edit then Cut. After that, click the Save icon to save the file. The program will also automatically create a backup of the file. See image.
And the problem is fixed. You can now start Smb4k without seeing the missing share error in your Linux Ubuntu.


