
I'm new to using Corel Draw Image Editing Software for web development and designing. I usually use Adobe Photoshop and so I'm having problems with how to do with Corel and one of them is creating a vignette effect. Any one has experience with using Corel Draw?
Vignette Effect in Corel Draw
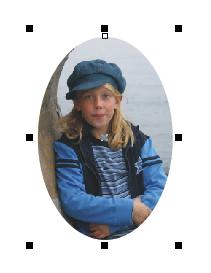
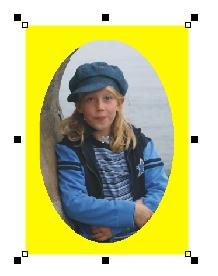
A vignette is a soft fade effect in an image. It is a popular photo effect where the photo gradually fades into a solid colored background, usually in an oval shape. Below is an example of a vignette effect in a photo.

Here’s how you can create an oval vignette using the image below. This guide is also available at MTM Marketing | Creating an Oval Vignette.

Click on the Ellipse Tool to create the oval shape.

Next, draw an oval.
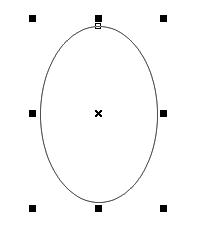
Place or move the oval over the image.

Select your picture [1]. You know it is selected as the status bar indicates that you have an RGB photo selected [2]. After that, select PowerClip.

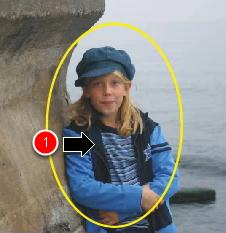
Next step is to click inside the oval. With the photo selected your cursor will change into a black arrow [1]. Click inside the oval with the arrow.
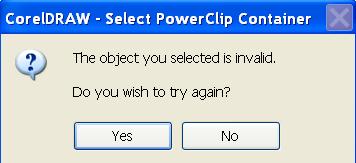
It is also possible to get an error like the one below. This is typically because you do not have the photo selected or you are not clicking inside the oval or the oval is not a valid vector.
Here is the PowerClipped image. The next thing to do is to remove the yellow line.

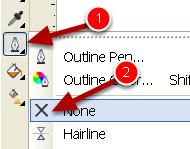
To remove the outside line, select the pen tool in the toolbox [1] then the "X" to remove the outline [2].
Here is the photo with no outline.
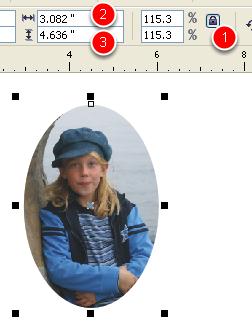
The next thing to do is to resize the PowerClip. It is good practice to resize your image before you convert to a bitmap. Make sure you have your scale lock on [1]. Then change your horizontal [2] or vertical value [3]. Because the lock button is on, entering one value automatically scales the object in the other direction.
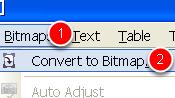
Convert the image to bitmap by clicking on Bitmap [1] then Convert to Bitmap [2]. To be able to apply the vignette, you need to convert your PowerClipped photo to a bitmap.
Setup for Lasering. The resolution should be 150 dpi. Convert your image to grayscale then make it transparent. Next is to setup for sublimation. If you are doing this for sublimation then it is best to setup your conversion to bitmap as per the figure. Set your DPI to 300 [1]. Your color model should be RGB [2] for ink jet and cmyk for laser printers. Use the transparent background so that you get rid of the white box that surrounds the photo [3].
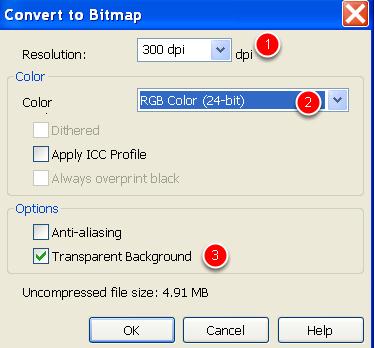
When you select the transparent image you can place a colored background on your image.
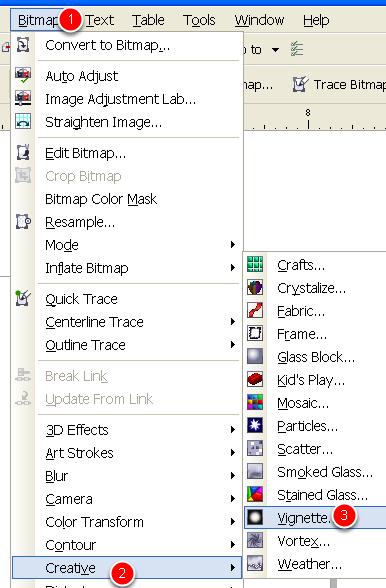
Go to Bitmap [1], Creative [2], then Vignette [3].
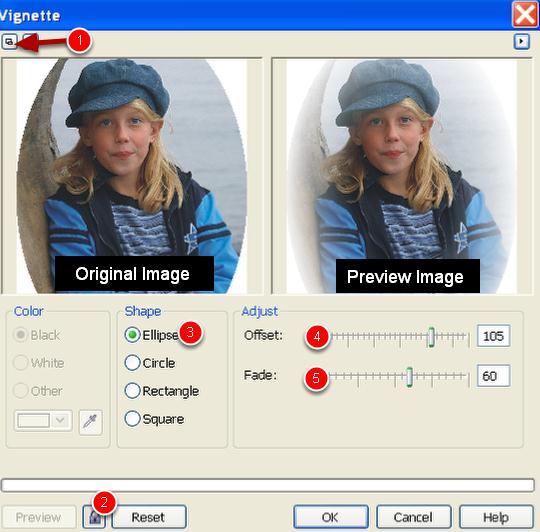
In the Vignette window you need to do a few things. First of all you need to see the preview windows. Click on the dual window preview [1]. Click on the lock icon so that you can see any changes [2]. Select the Ellipse shape [3]. Adjust your Offset [4] and your fade [5] accordingly to what you want.
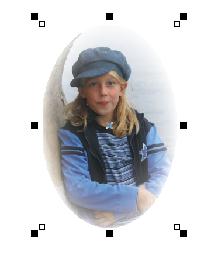
And the vignette is done. You will notice the fading effect inside out.


