
Hello trouble shooters,
I downloaded GNS3 in my computer, the download and installation is pretty good without any problem. But the problem is when I add the color scheme to default settings and then I added the IP to the host name there the problem appeared. I have access and authorized to the network connection. But then what might be the problem. Please suggest me some solution. Thanks in advance.

Unable to open connection to 10.2.12.68
Network error: Cannot assign requested address
Network error Cannot assign requested address
First thing to know before using PuTTY is to check if it supports your operating system. You can use PuTTY on computers running on Windows 95, Windows 98, Windows XP, Windows Vista, and Windows 7. Normally, the “putty.exe” file you download is already good for simple SSH. If you already have the file, place it in “C:WINDOWS”.
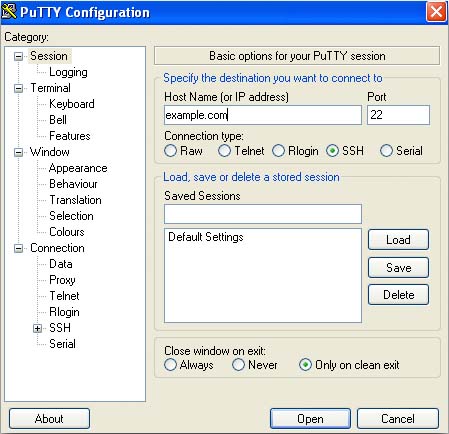
To use PuTTY, double-click on the “putty.exe” file or launch it from your desktop if you created a shortcut. In the PuTTY Configuration screen, enter your connection settings. For the “Host Name [or IP address]”, type the address like for example “s00000.gridserver.com” without the quotes. In Port, leave it with the default value 22 as well as the “Connection type”, leave it with SSH. After that, click Open to begin the SSH session. See image.
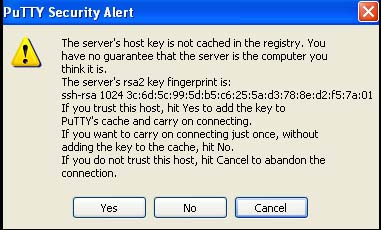
In case you are prompted, this means that this is the first time you use the computer to connect to the server. Just click Yes to accept the connection. See image.
Once the SSH connection has been established, a terminal window will appear asking you to enter your username. Here, enter your primary domain for example “example.com” without the quotes. See image.

After that, enter your password. While typing your password, you will not see any characters appearing on the screen as you type. This is normal and is a standard security feature of PuTTY. Hit Enter when done. See image.

When your login is successful, you should see the next screen. You can now start entering the commands in the command prompt. See image.


