Learn How To Install Dell Optiplex Gx520 Hard Drive
Asked By
kuda Hlazo 0 points N/APosted on - 07/22/2016
Hi. I am using Dell, and I want to install Dell optiplex gx520 hard drive. So, can you please give the steps to install the hard drive? Thanks in advance. It is urgent.
Learn How To Install Dell Optiplex Gx520 Hard Drive
The Dell OptiPlex GX520 computer is available in standard CPU tower and small form factor. This Dell CPU model supports SATA drives only. If you will be connecting a PATA drive or IDE drive, you will need a cable converter for the data cable and power supply cable because SATA drives use a different set of cables.
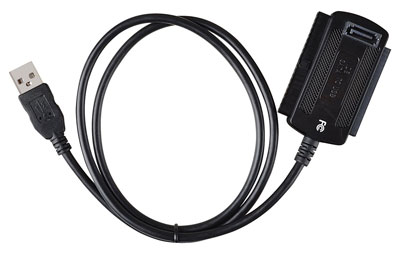
Me, I use a USB 2.0 IDE to SATA converter to connect my IDE hard drive to my SATA-only CPU.
USB 2.0 IDE to SATA converter
Also, before connecting an IDE hard drive, you need to configure it first. If you’ll be connecting it using a USB adapter like in the image above, no configuration is required. But if your computer supports IDE drives, you need to configure it first using the correct jumper. The correct jumper setting is printed on top of the drive.
If you’ll be using the drive to install Microsoft Windows, you need to set it to “Master” else you can set it as “Slave”. Once the correct jumper is set, you may now connect it to your CPU using the ribbon cable and the power supply cable. You need to fasten it properly with the screws on the tower.
Once the drive is secured on the tower, plug the CPU to the power and turn it on. Next, press DEL, DELETE, F2, or whichever key is used to go to the BIOS. In the BIOS, navigate to the drive management section then detect the drive. After this, save the new settings and exit. Boot normally and the new drive should appear on your computer.
Discover the ins and outs of Krikya Bangladesh, a prominent bookmaker in the online betting scene. This detailed review covers everything from the diversity of sports betting options and casino games to user experience, security measures, and customer support efficiency. Whether you're a seasoned bettor or new to the online gambling world,
find out how Krikya stands out in the competitive market of Bangladesh.
Construction management is essential to ensure project completion in a timely and cost-effective manner. Construction management software support businesses to operate efficiently. The software is available for all types of construction projects, including residential...
Mirrorless camera is the latest obsession among the photographers. The cameras have altogether replaced the traditional DSLR models with their unique and special features.
A mirrorless camera is a light-weighted electronic device device that utilizes...
The finest laptops are powerful enough to do your daily tasks, comfortable enough to use all day, and power-efficient enough to ensure you don't run out of battery power unexpectedly. Of course, all these...
Before getting into knowing the facts, let’s have a brief about the Dark Web. The dark web is the data of the World Wide Web that is accessible only through special software, combinations, or...
While looking for a chemical-free way to clear and purify both durable and low grounds in your home, a steam cleaner is an excellent solution. With a spurt of superheated steam, this cleaning equipment...
Internet monitoring software keeps a log of all internet activities. You can install this type of software on your computer remotely or by the administrator. An operating console controls this software. This type of...
A Hard Disk Drive is usually partitioned into various smaller drives for optimization. A partition manager helps make this process easier and more efficient. Here, let’s discuss the top 10 best partition manager software.
1....
Music production is the initial stage of any song. Music production can be done either in studios or at home using an online music production software. Here, let’s discuss the top 10 best online...


