
Hi,
I have a problem on troubleshooting the networking connection error. In addition, I cannot either troubleshoot the printing and scanning processes that have become frequent in my system.
How can I be successful on troubleshooting these kind of problems?
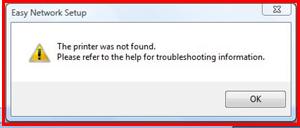
Easy Network Setup
The printer was not found.
Please refer to the help for troubleshooting information.
How to Troubleshoot Easy Network Setup on Printing and Scanning
First, you must know your printer's Manufacturer, model name and IP address in order for you to install a network printer.
To setup a network printer, click on the Start button, then go to Control Panel, click on Printers and Faxes and select Add Printer.
The "Add Printer Wizard" window will then open. Click "Next" and select "Local printer attached to this computer". Make sure that the "Automatically detect and install my Plug and Play printer is not checked. And then click "Next" to continue.
We will create a new port for your network printer so select "Create a new port". Beside the "Type of Port", click on the down arrow, then select on "Standard TCP/IP Port". Click "Next" to continue.
A new "Add Printer Port Wizard" will pop up. Just click "Next" to continue.
You must now type in your printer's IP Address in the "Printer Name or IP Address" field and click "Next" to continue.
You will see on the screen "The device is not found on the network" if you have problems installing. This means that the IP address is not available on the network so you should select "Back" button and make sure you entered the correct IP Address. And also, make sure that your network printer is powered on and displays a "ready" status.
If you have not encountered any problems, Windows will scan the network to find your printer's IP address. It will take few seconds. Select "Finish" to continue.
Select the printer's manufacturer and model. You will be prompted to confirm the selected printer driver so select the "Keep existing driver" and click "Next" to continue.
You will be asked to assign the printer Name. You can just use the default name, or you can assign your own. Select "Yes" if you want to use the printer as the default printer and click "Next" to continue.
You will be asked to share the network printer. Select "Do not share the network printer" and click "Next" to continue.
You will be asked to print a test page, select "yes" then click "Next".
Make sure your page was printed and select "Yes" when asked to confirm a successful test page. Click the "Finish" button to complete the Add Printer Wizard.
Hope this helps.


