Asked By
F Samuel
10 points
N/A
Posted on - 09/26/2016

Self-hosting means to be the owner of your site. You can change and add things to it. If your site URL has www.wordpress.com or www.blogspot.com written on it then it is not self-hosted and you may not know when it gets down. how to self-host a website to have the full ownership.
Answered By
R Palmer
15 points
N/A
#94361
How To Self-Host A Website To Have Access To All Website Files.
To start the process of self-hosting, follow the steps:
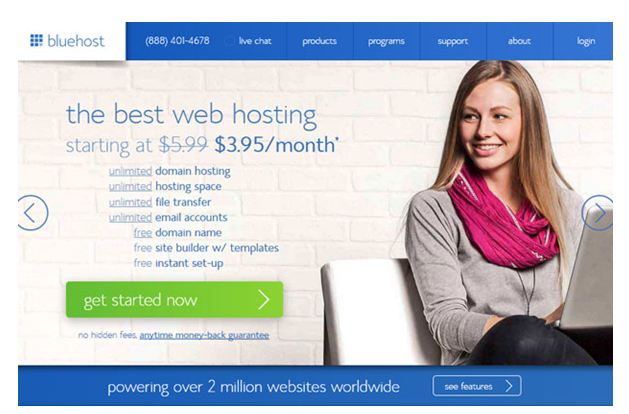
1) Go to www.bluehost.com and select ‘get started now’.
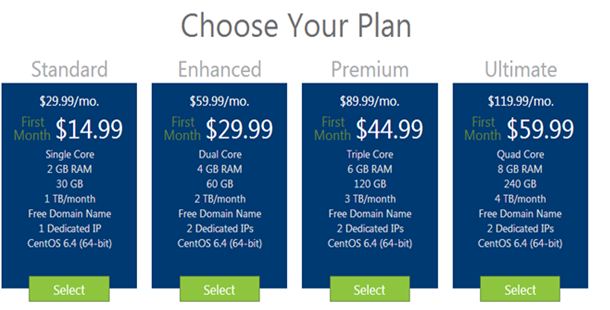
2) Choose the plan comfortable for you. Beginners are recommended to choose the ‘standard’ plan.
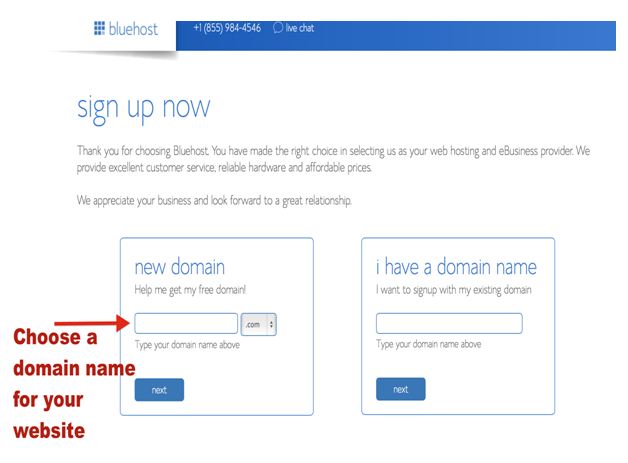
3) From the two boxes, decide either you want to buy a new domain or it already exists.
4) A list will appear, click on any one of them.
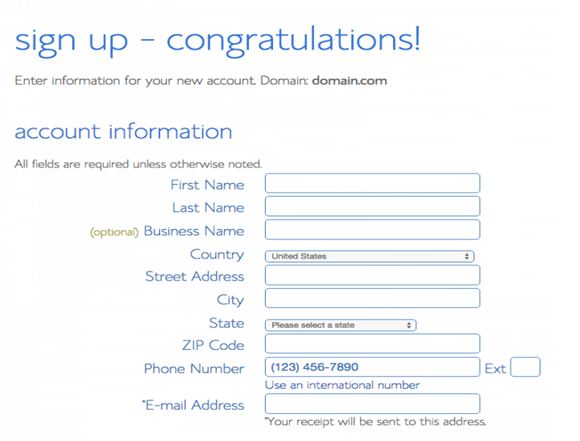
5) You will be redirected to the sign up information page. Fill up all the information and then click on next.
6) The next page will show the upgrades. Choose as per your convenience.
7) Scroll down and click on ‘Complete’ button.
8) Congratulations page will appear. You have to set a password for your account.
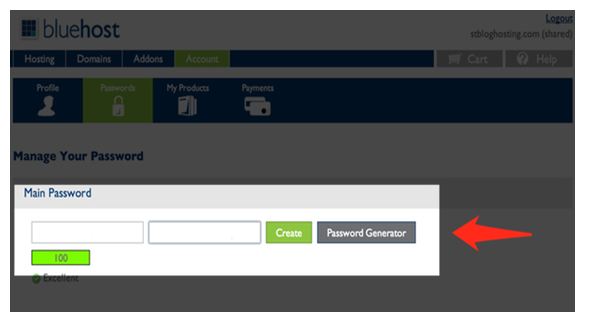
9) You will be logged to your account. Type in your password and click on Create button.
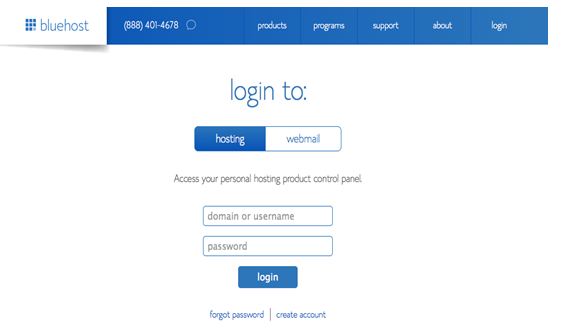
10) Now login to your hosting account.
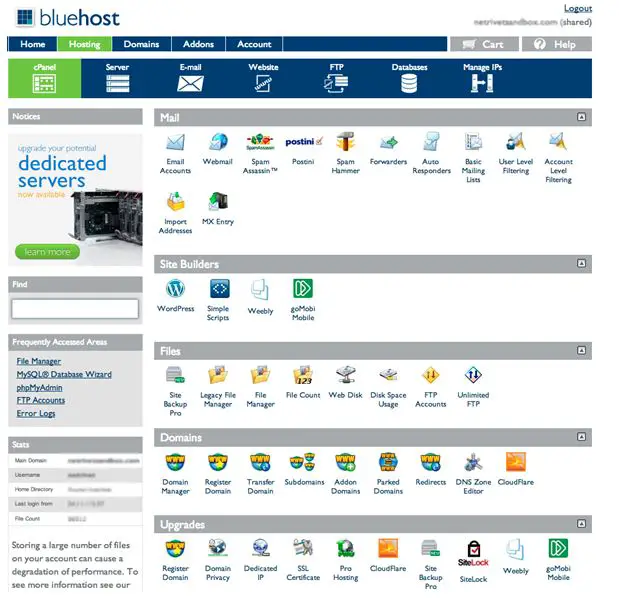
11) Skip the upgrade.
12) Click on ‘I can do it’ button.

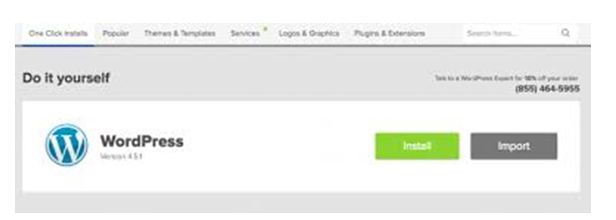
13) Go to website box and select install word press.
14) Click on install.
15) Enter your domain name and then press check and then ‘I have read the terms and conditions’.
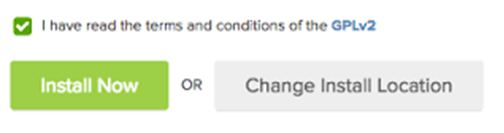
16) Click on install now.
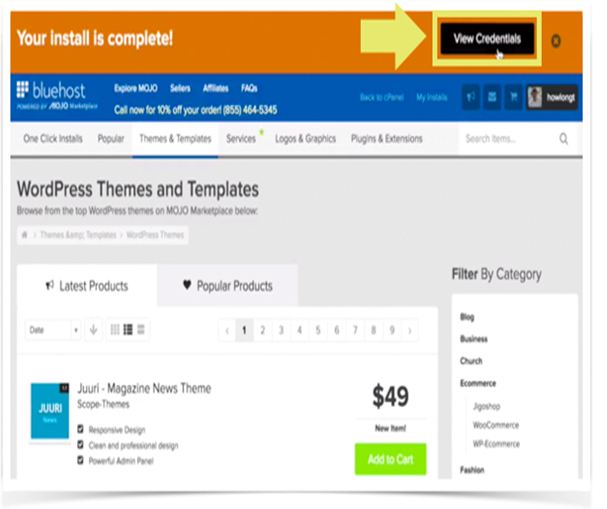
17) Click on view credentials.
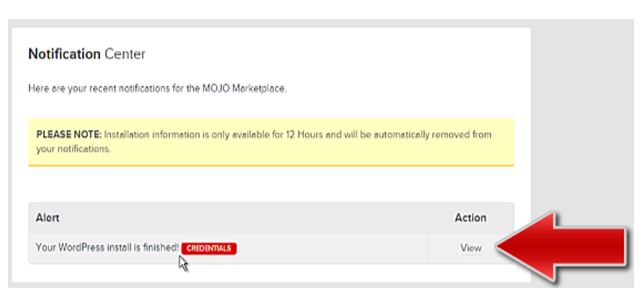
18) In the alert tab select view.
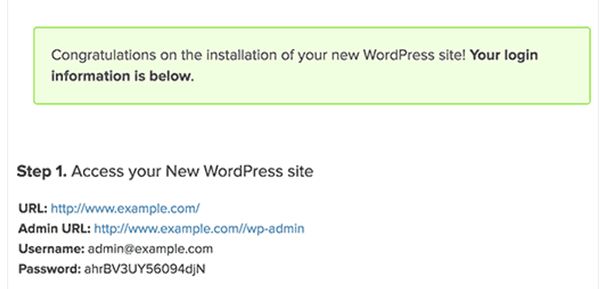
19) Login to your web page by clicking on Admin URL.
20) Click on Authorize Jetpack.

21) Skip the next step and you will be redirected to WordPress administration window.
22) Click on any option. You can view your site. Now you have self-hosted the site.


