
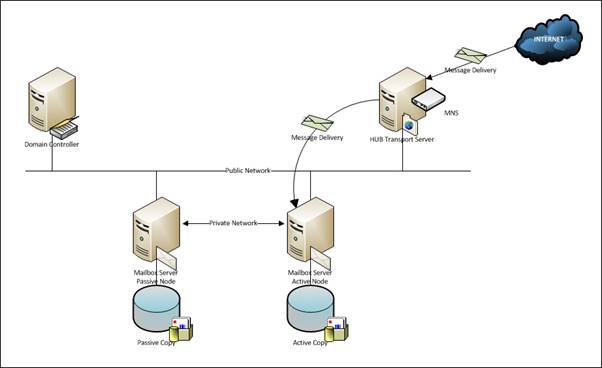
Clustering of Mailbox Servers based on CCR Clustering
What is CCR Clustering?
Cluster Continuous Replication or CCR is a new feature of Microsoft Exchange 2007. It is a combination of active/passive Windows Clustering found in Windows 2003 Server which has a capability of combining Exchange 2007 log file shipping and replay features.
A CCR cluster is referred to a set of mailbox servers clustered in a way that each Mailbox server maintains its own copy of database that is attached exclusively to it. These server-maintained, databases replicate with each other and work in Active / Passive mode.
It also represents a high availability of mailbox server and database by keeping 2 copies of data. In order to form a CCR cluster the databases can be stored on 2 different SANs or they can reside in the internal storage’s of Mailbox servers.
Deployment Considerations
Before deploying Cluster Continuous Replication (CCR), make sure that these certain requirements are met:
- A Windows 2003 Active Directory forest (functional level raised to 2000 or 2003)
- Two Windows 2003 Server Enterprise Edition Servers (SP1 is a minimum requirement however R2 is a good choice)
- One Windows File share Witness (Microsoft recommends to use an Exchange 2007 Hub Transport Server for this in same Exchange 2007 organization)
Installation
There are few pre-requisites to be followed for installation of CCR cluster.
Who can install a CCR Cluster?
A user installing cluster must be member of the following groups
- Domain Administrators
- Enterprise Administrators
- Local Administrator
What are the Hardware Requirements?
Depending on hardware availability and utilization requirements Mailbox server is installed on a separate physical or virtual machine.
Mailbox Server does not require Internet connection so generally it is not placed in DMZ in a corporate network.
In case Active Directory is running on 32bit platform, there should be a ratio of 1:4 for Active Directory processor cores to Exchange 2007 Mailbox processor cores.
If Active Directory is running on the x64 platform (64-bit), the recommended ratio is 1:8
Mailbox role requires 2GB of RAM for its own processing
For every mailbox additional 5MB of RAM is also required, e.g. for 100 mailboxes a total of 2GB+500MB RAM will be required
1.2 GB free space available on installation drive and 200 MB free space on system drive
For Hub server and EDGE server queues a minimum of 4 GB disk space is required in addition.
File system must be formatted as NTFS on all drives
A heartbeat cable for cluster replication is also required.
What are the Software Requirements?
The Minimum requirement for Domain Functional Level is Windows 2000 (Native)
Operating system must be Windows Server 2003 64bit with SP1 or higher
Operating system must be fully patched and must have an antivirus installed with latest definition updates before you perform any installation activity.
Make sure that these basic Windows components are present on the server before we begin the installation of any exchange server role:
- Internet Information Service (IIS)
- Dot Net Framework 2.0
- MMC 3.0
- Windows Power Shell 1.0
Once all the hardware is configured and all the requirements are met, we can now proceed with the installation process.
Installation Procedure for Clustered Mailbox Role
In first stage, we are going to install and configure OS level Windows Active/Passive clustering.
In second stage, we are going to install and configure application level Exchange 2007 Mailbox clustering.
Installing and Configuring Cluster Pre-Requisites
In order to establish a cluster, first you need to have a very stable Local Area Network (LAN).
Second, you must have two IPs of same subnet to use as your AD, DNS and other exchange servers. These two IPs will be used for two exchange mailbox physical nodes:
- 1 IP of same range is required for cluster management.
- 1 IP of same range is required for exchange server’s virtual node.
Next, you need two IPs of a private range which are not used on your LAN environment and by any other computer or application. These two IPs will communicate to each other for cluster replication through heartbeat cable.
In order to make it more clearly, we mention here the IPs used for this article and environment
Let’s say we use following IPs (same subnet as other server roles)
Mailbox Node1(Physical/NIC1) 172.16.1.11
Mailbox Node2 (Physical/NIC1) 172.16.1.12
Mailbox Cluster (Virtual) 172.16.1.13
Windows Cluster (for Management) 172.16.1.14
Now in order to establish cluster replication between two nodes we use a different scheme which is not used elsewhere in our environment
Mailbox Node1 (Physical/NIC2) 10.1.1.1
Mailbox Node2 (Physical/NIC2) 10.1.1.2
Create a shared folder on a third server within same environment and subnet as “Majority Node Share” (Microsoft recommends it to be placed on Hub Server however it can be placed on any stable physical server)
Create a new user in active directory and grant full access to the user account for this majority node share For our environment we have created a user named as: clsAdmin
It is important to create a separate user for cluster administration. This saves a lot of hassle in future
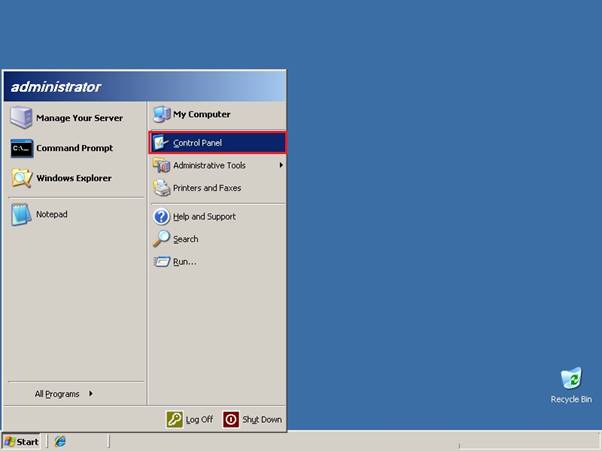
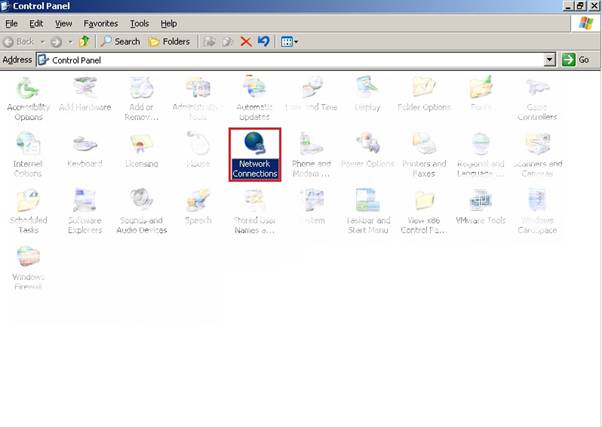
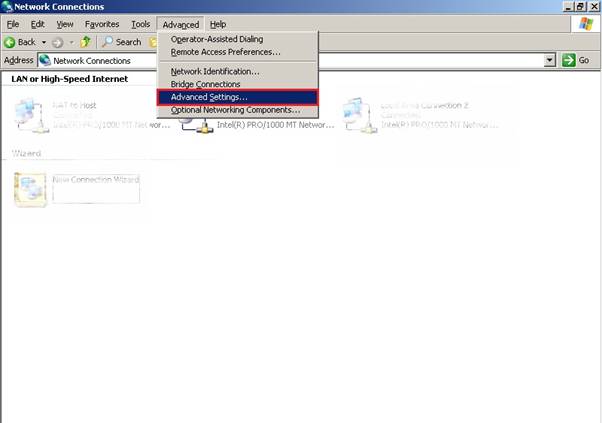
Now in order to configure the network setting for cluster,follow these steps:
Go to Start, then Control Panel.
Open Network Connections.
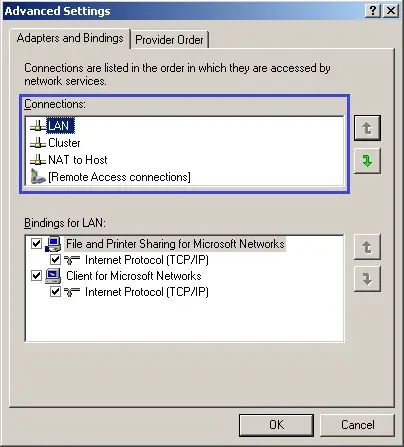
From the menu bar on top, go to Advanced and select Advanced Settings.
In the Advanced settings under Adapters and Bindings tab, keep LAN connection on highest priority and Cluster on lower priority.
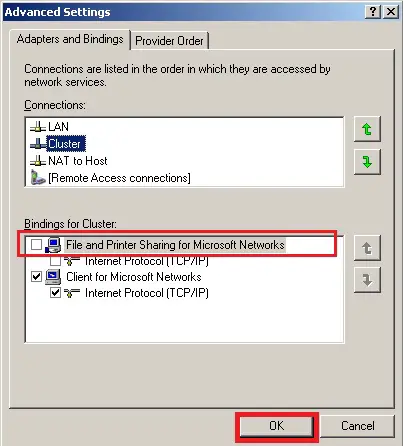
Select the Cluster connection, then uncheck File and Printer Sharing for Microsoft Networks and click on Ok.
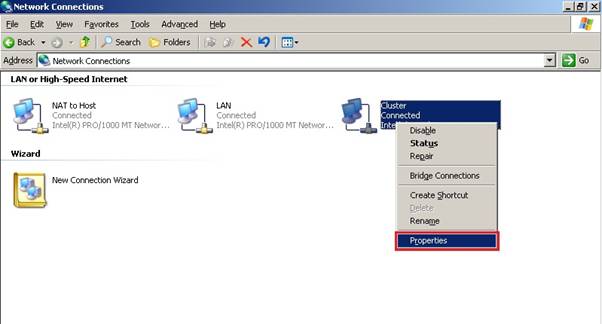
On the Network Connections, right click the Cluster icon then select Properties.
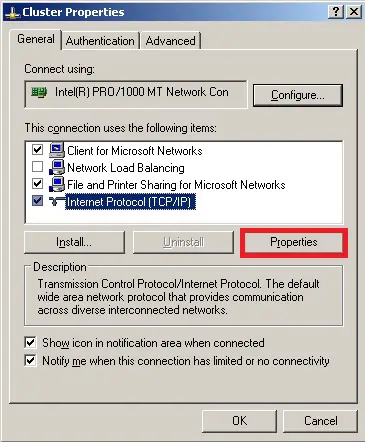
Under General tab, select Internet Protocol (TCP/IP) properties) then click on Properties.
Go to DNS tab and uncheck Register this connection’s address in DNS.
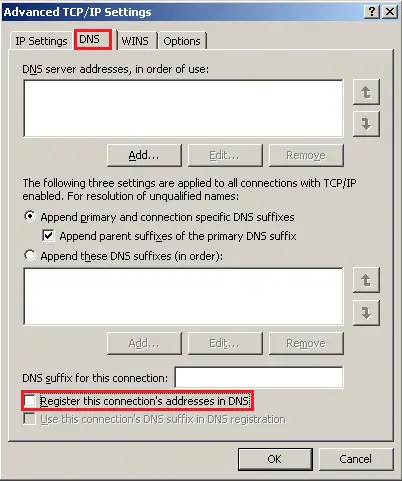
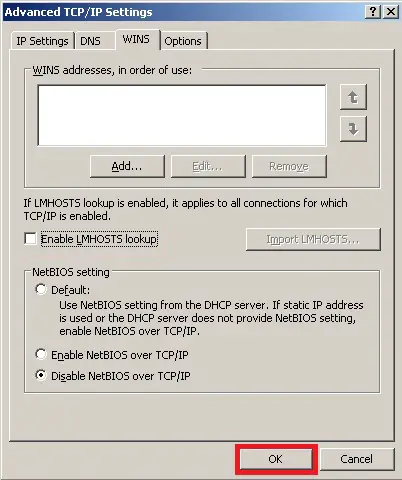
From WINS tab make sure Enable LMHOSTS Lookup is unchecked and the Disable NETBIOS over TCP/IP is selected.
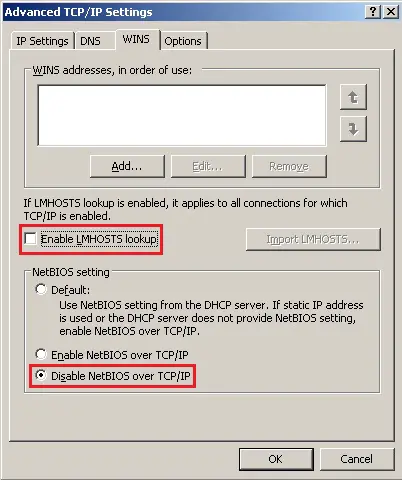
Click OK.
Now, go to Start then Administrative Tools and select Cluster Administrator.

Once the Cluster Administration opens, the Open Connection to Cluster window will automatically show.
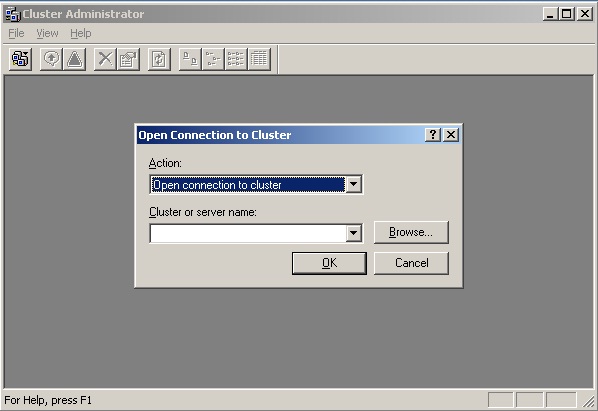
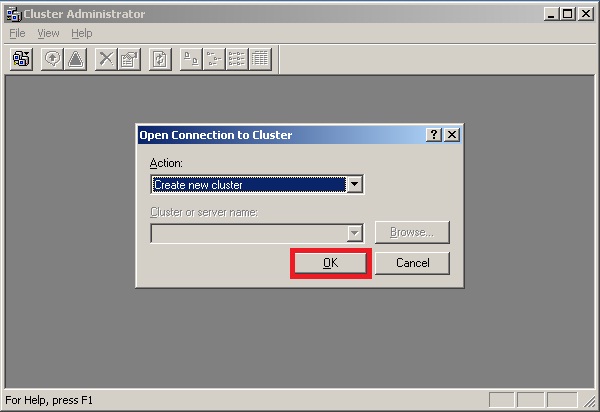
From the drop down menu of Action, select Create new cluster.
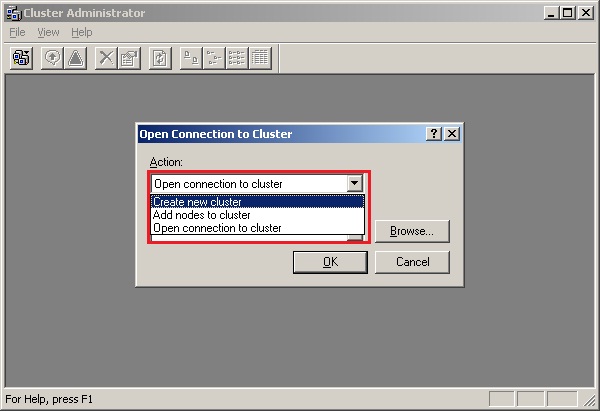
Click OK.
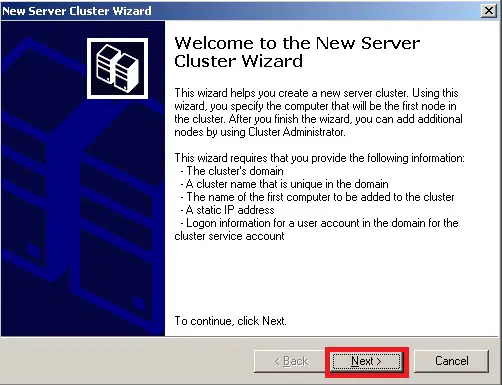
New Server Cluster Wizard window will open then click on Next.
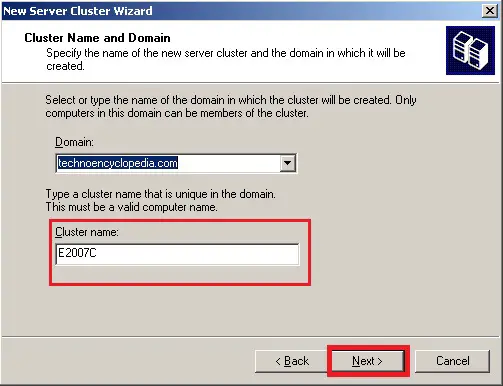
Domain name is selected by default, however,for multiple domains you will have to select the desired domain name from the list in the dropdown menu.
Under Cluster name, you may give a descriptive name as per your organization’s naming convention.
Click Next.
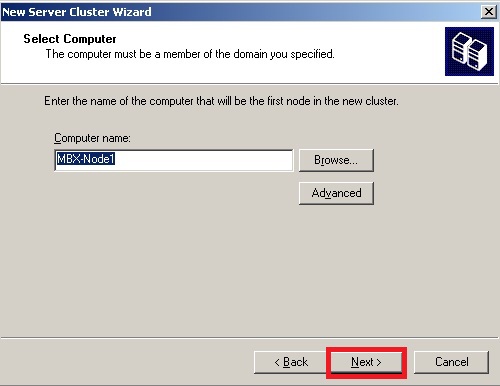
In the Computer name field, click on the Browse button to select for a computer name.
Click Next.
The Cluster configuration will now start.
Click Next.
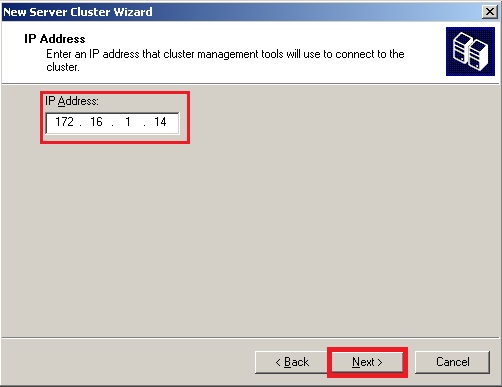
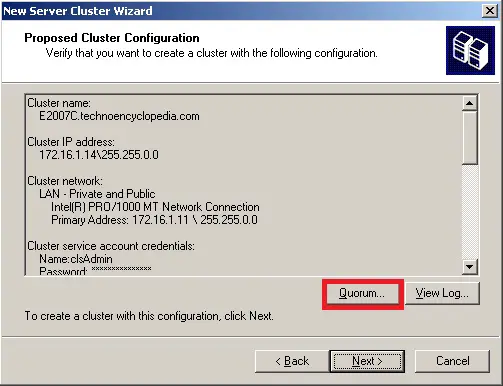
Enter the IP address we reserved for cluster administration.
Click Next.
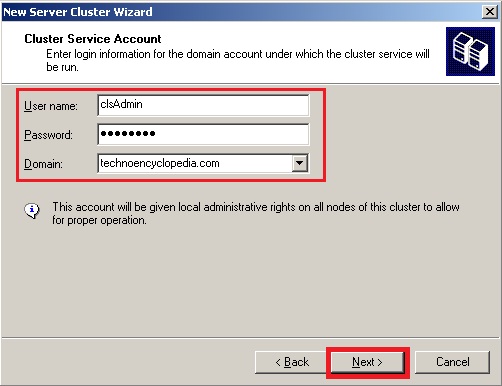
Provide the credentials for cluster administrator account we created earlier.
Click Next.
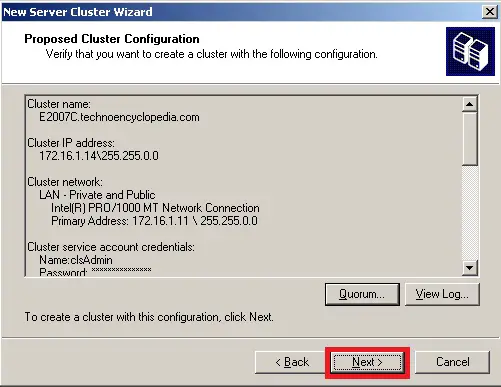
For this window,before proceeding any further, click on Quorum button to configure the quorum settings.
Select Majority Node Set from the drop down list and click OK.
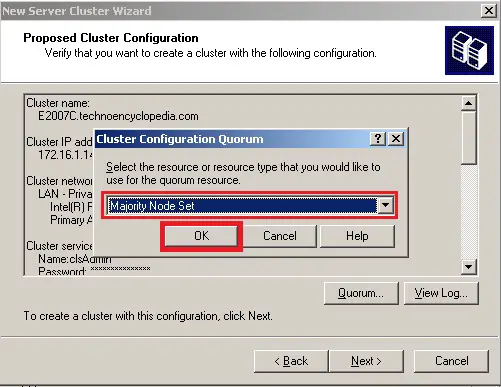
Click Next.
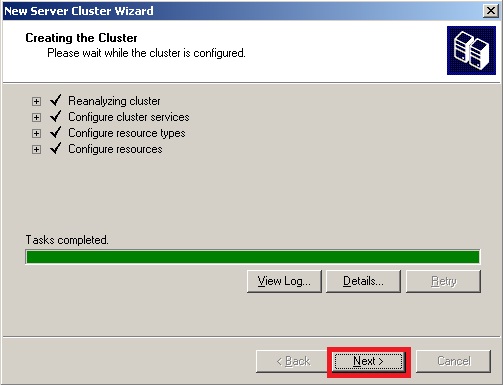
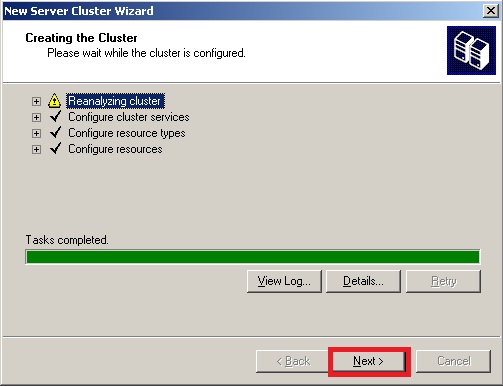
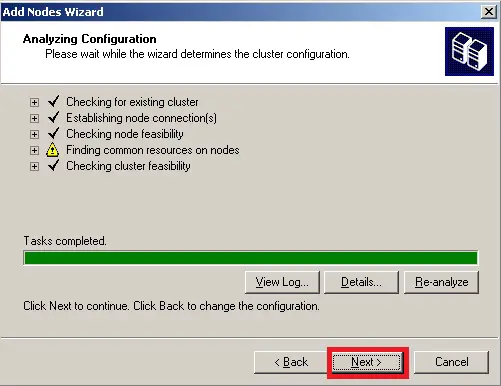
The cluster creation will be done after a re-analysis.
It is normal to have some warnings while creating 1st node of cluster. You may ignore them once you see Tasks completed.
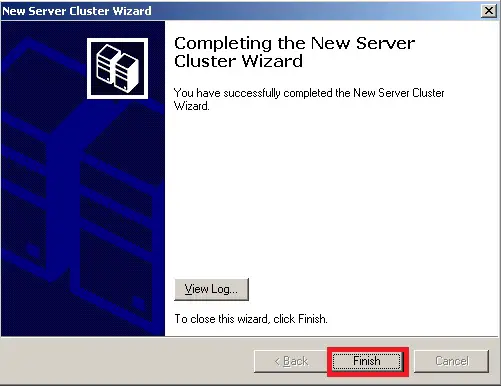
Click Next.
Click Finish to close the wizard.
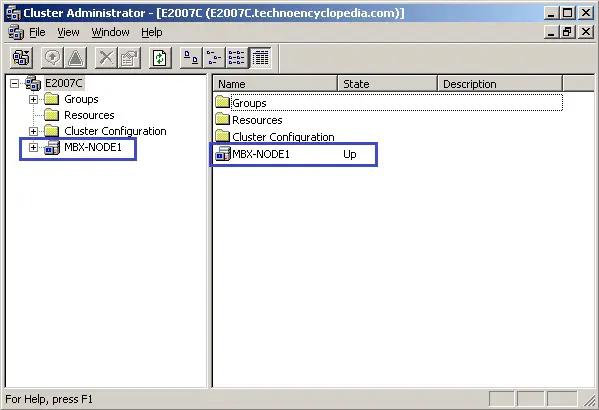
Now you will observe mail box node we created is present in the cluster administration console.
Click on Action button to do remaining configuration.
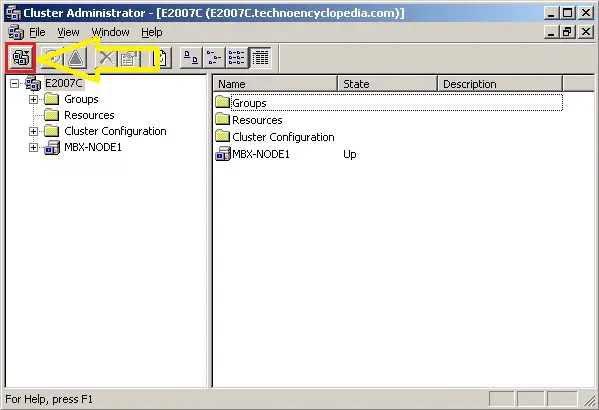
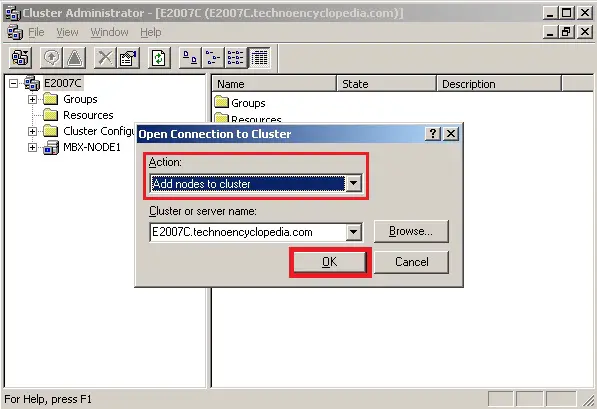
Select Add nodes to cluster from the drop down menu and click on Ok.
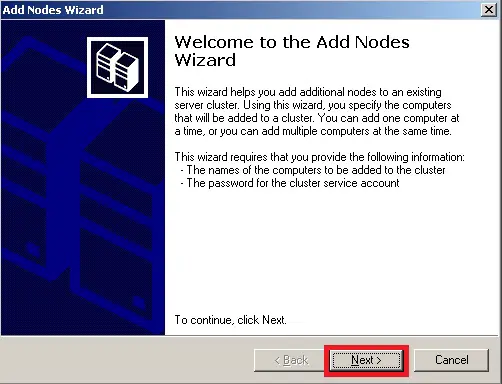
The Add Nodes Wizard window will open then click on Next.
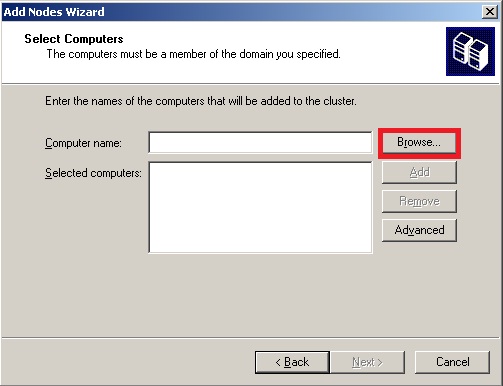
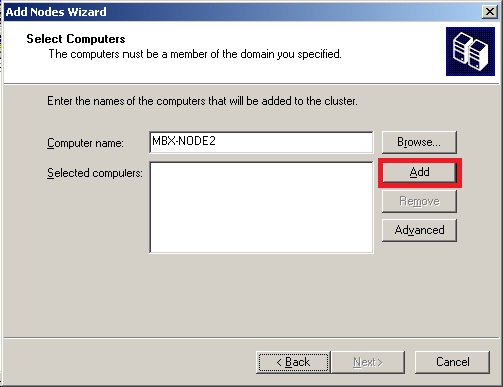
Click on Browse button to select the second node computer.
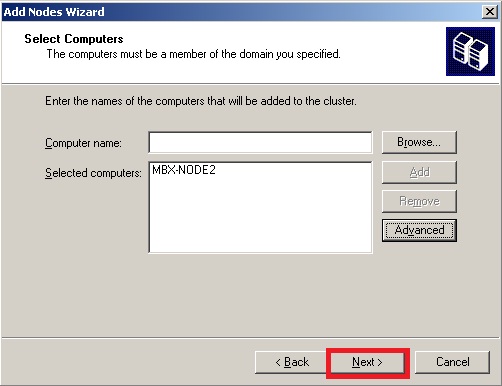
Click on Add button to add this computer in the list.
Click Next.
When cluster completion task is completed click on Next.
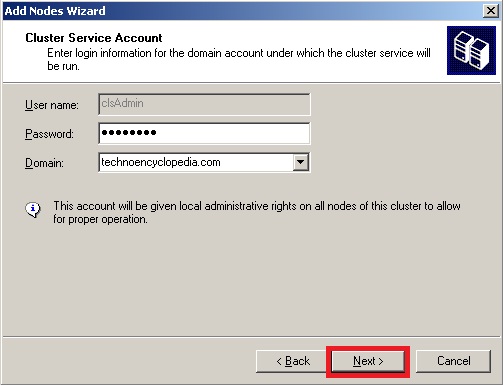
Provide the credentials for the cluster administration account then click on Next.
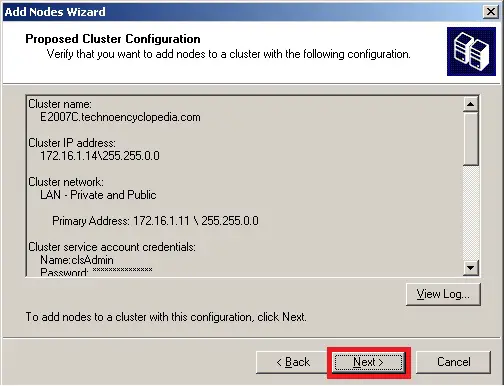
After reviewing the summary of cluster settings, click on Next.
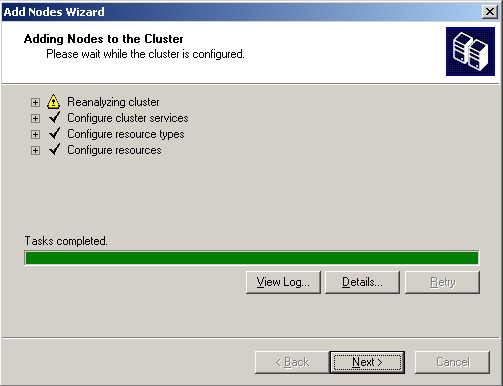
It will now start to configure the cluster. When the Tasks completed shows, you may now click on Next.
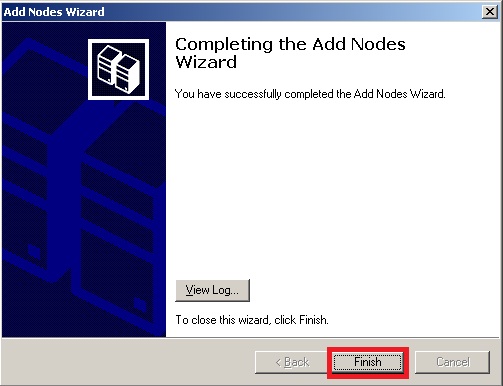
Click Finish.
You will notice the second node is also added to the Cluster Administration window.

Now we are going to configure a Majority Node Set (MNS) quorum with file share witness.
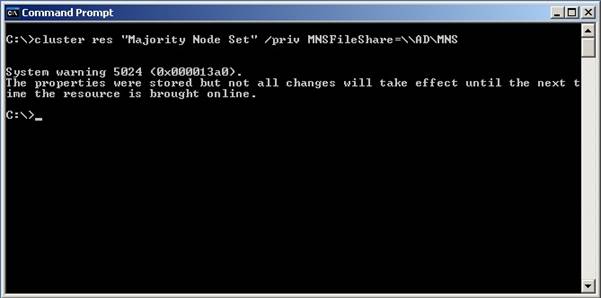
Open a command prompt then type this command:
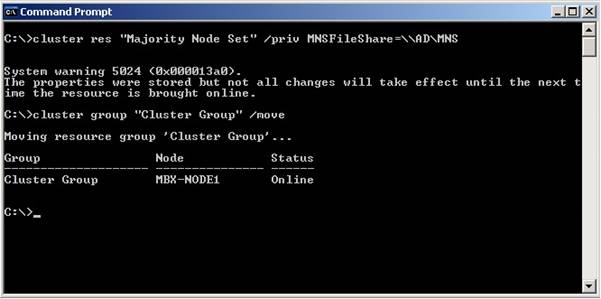
cluster res “Majority Node Set” /privMNSFileShare=ADMNS
In this command, AD is the name of the server and MNS is the name of folder shared as Majority Node Set.
Now type this command to move the cluster group between two nodes:
cluster group “Cluster Group” /move
A successful move will ensure that the cluster is working fine.
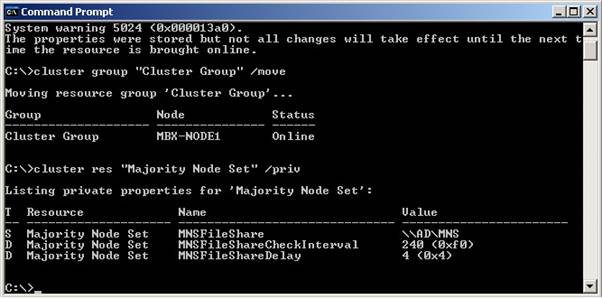
Properties of Majority Node Set can be viewed by this command:
cluster res “Majority Node Set” /priv
Installing Exchange Server Pre-Requisites
For the installation of Internet Information Services (IIS) follow these steps:
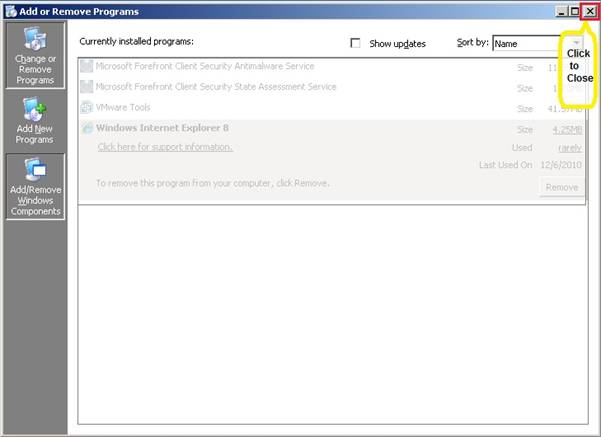
Go to Start then Control Panel and select Add or Remove Programs.
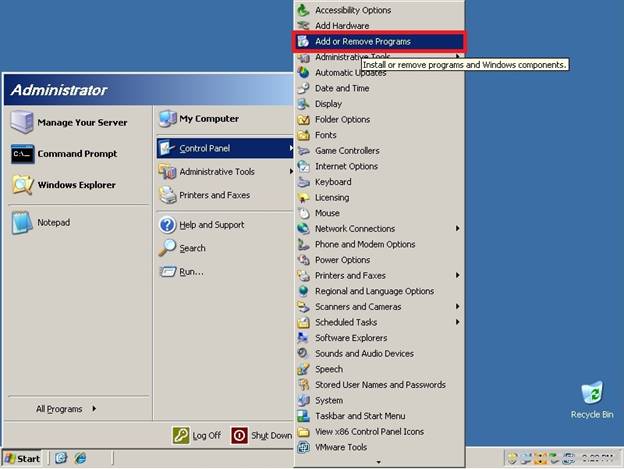
On the Add or Remove Programs screen select the last option on the left side(Add/Remove Windows Components).

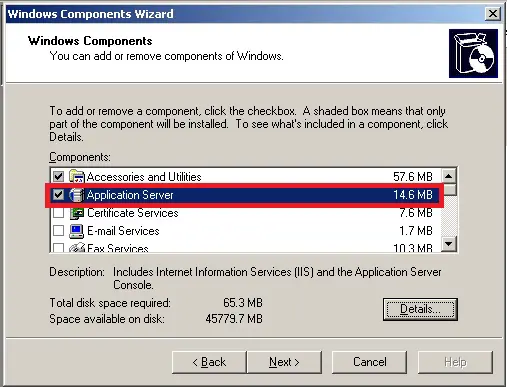
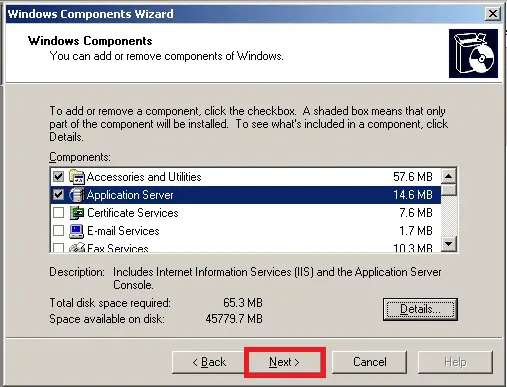
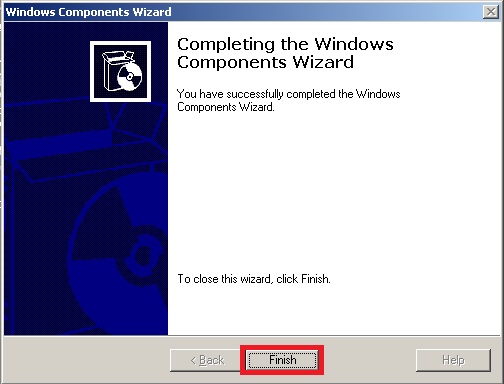
Windows Components Wizard screen will open, then place a check on Application Server checkbox and click on Next.
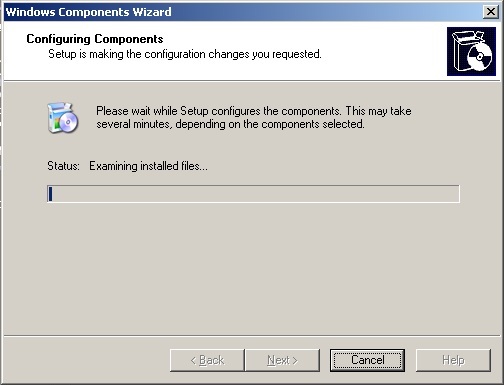
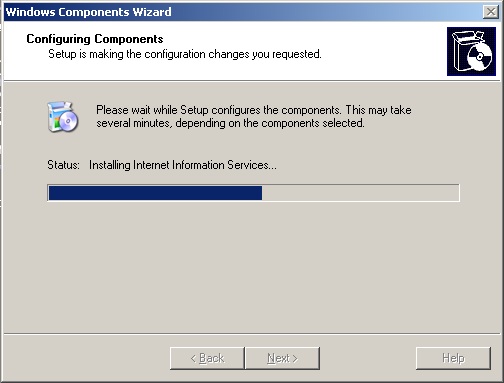
The installation will begin for IIS services.
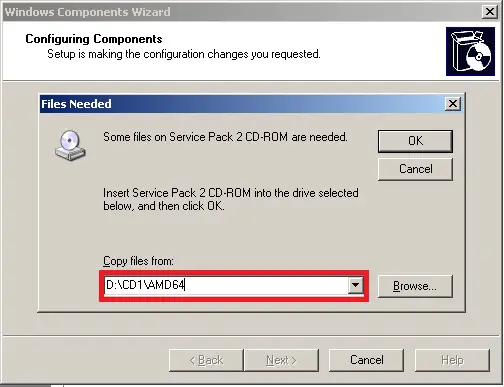
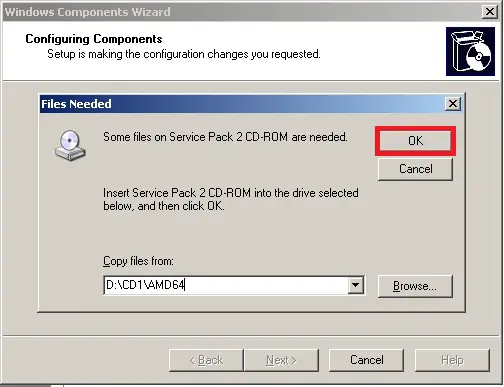
In some scenarios when an Insert Disk window appears asking for additional files, click on OK to Copy files from then provide the correct path of the directory or CD location by clicking browse button shown on your pop up screen.
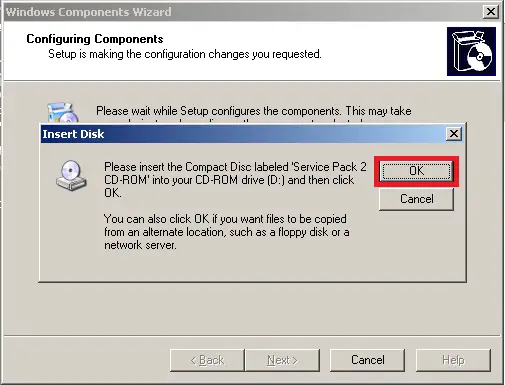
After selecting the correct path, click on OK to continue installation process.
The IIS installation will now start.
Once the installation is completed, click on Finish to exit.
Now close Add or Remove Programs window.
Before we continue further on this process, we need to have a re-distributable installation package of dot Net Framework 2.0 from Microsoft’s website.
You can download dot NET Framework 2.0 from this URL:
http://www.microsoft.com/en-us/download/details.aspx?id=6523
After downloading the executable file on your desktop, double click on this file to initiate the installation procedure.
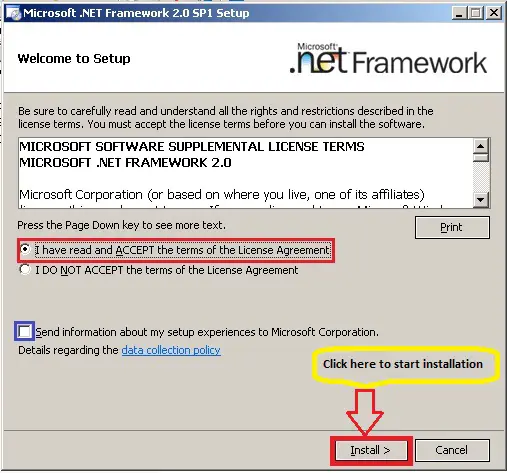
On the first screen it will ask for user’s consent to install dot Net Framework 2.0.
Select I have read and ACCEPT the terms of the license agreement.
You may leave the blue highlighted checkbox blank if you want as this is optional.
Then click on Install.
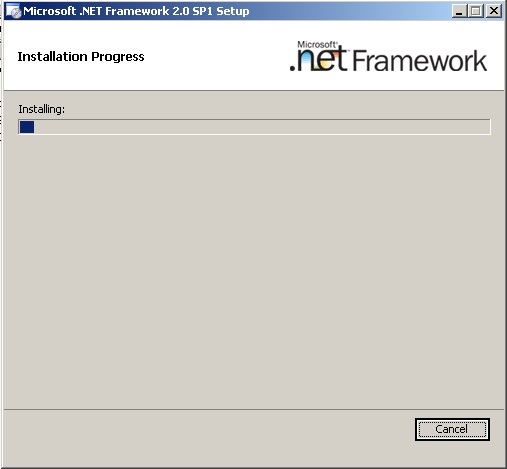
The Installation will start for dot NET framework 2.0.
Click Exit button to complete the installation process.

Microsoft Management Console (MMC) 3.0 generally comes pre-installed with X64 bit systems however it can be downloaded from this URL if required:
http://www.microsoft.com/en-us/download/details.aspx?id=12709
Windows Power Shell 1.0 can be downloaded from this URL:
http://www.microsoft.com/en-us/download/details.aspx?id=11892
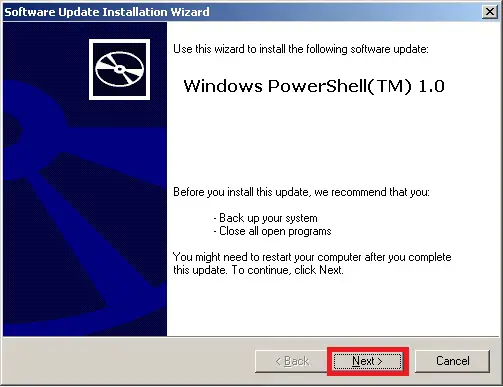
After downloading the executable file, double click on file to run the setup process.
On the first screen, click Next to start the installation of Windows Power Shell 1.0.
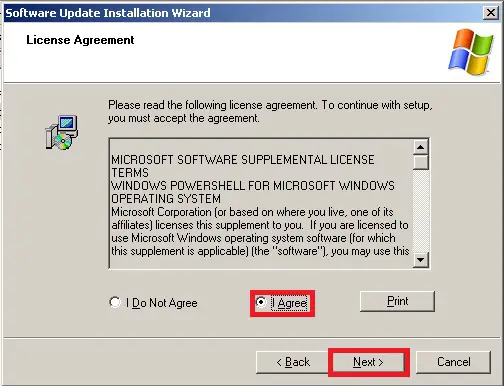
Then select I Agree and click on Next.
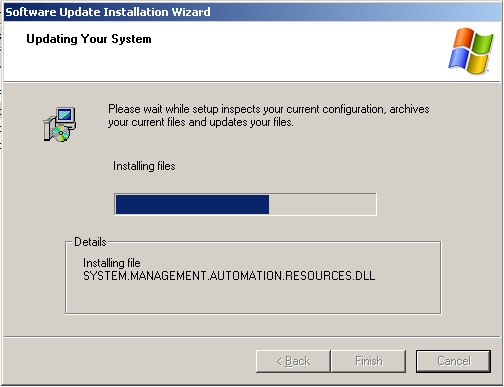
The installation of Windows Power Shell 1.0 will now start.
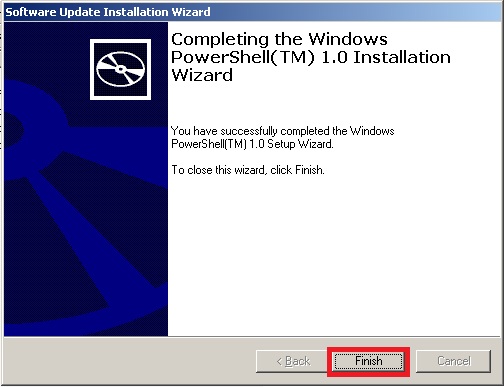
Once the installation is completed click on Finish.
After installing all pre-requisites, restart the computer for changes to take effect.
Installing Windows 2003 based Clustering
Installation of Exchange Server 2007 (Mailbox Role)
Active Node
On the machine proposed for active mailbox node, go to the installation source in DVD or where you have copied it after downloading.
Select SETUP.EXE which is usually found on the bottom part of the installation folder.
Double click this executable file to start the setup process.

Exchange Server 2007 window will open.
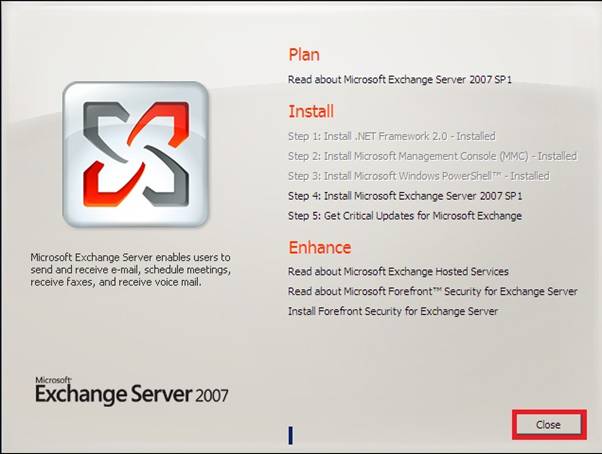
Here you can see that first 3 steps are grayed out because we have already installed pre-requisites and it also detected the exchange setup. If any of the first 3 steps are not grayed out please review your installation steps and repeat the installation procedure to correct the issues.
Now move to Step 4: Install Microsoft Exchange 2007 SP1 and click this option to begin installation.

It will prompt you to the Introduction screen of the Exchange Server 2007 SP1 Setup. This will show a brief description about the product.
Click Next.

On the license agreement screen, select I accept the terms in the license agreement and click on Next.

Next screen will show Error Reporting feature for exchange. This feature can be disabled with no effect on installation however to get a feedback from user end, Microsoft recommends that you click Yes to proceed.

On the Installation Type, you have two options: either you can go for typical installation which can install multiple roles on same box or you can select an inpidual role for this specific machine.
The scope of this document is to install Client Access Server only so we will click on second option which is Custom Exchange Server Installation.

After choosing the installation type, click on Browse button to indicate the path where you plan to put all the installation. In this example we are choosing a folder created for CAS installation on C drive.

Click Next.

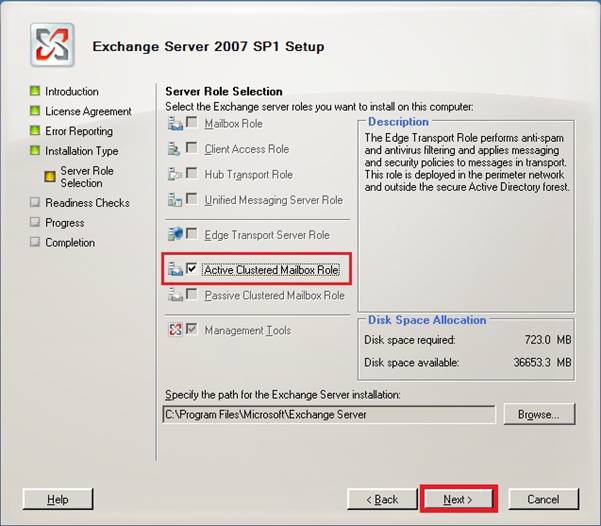
Server Role Selection screen will appear. Here you have choices to select any one or more server roles.
Select Active Clustered Mailbox Role and click on Next.
On the Exchange Organization screen, type the name of organization and click on Next.

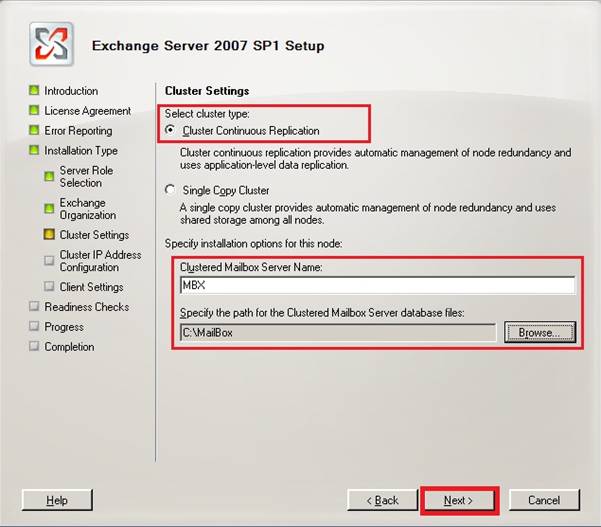
Under the Cluster Settings, select Cluster Continuous Replication. Below the window provide the cluster mailbox name and location.
Click Next.
For the Cluster IP Address Configuration, under the First Subnet, select IPv4 Network and choose Use the following static IPv4 address then provide the IP which we reserved for Clustered Application Node.
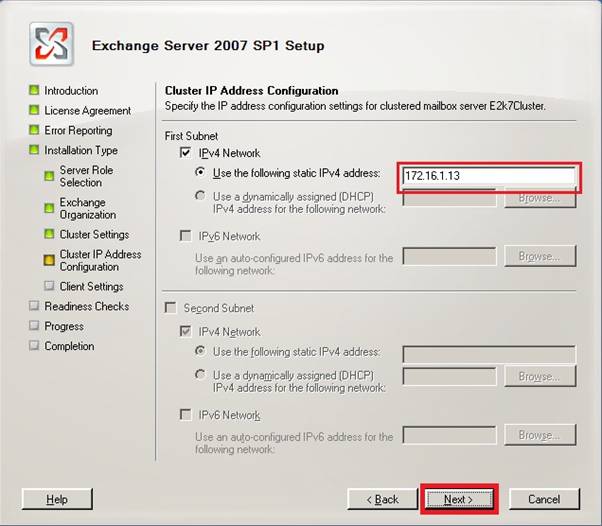
Click Next.
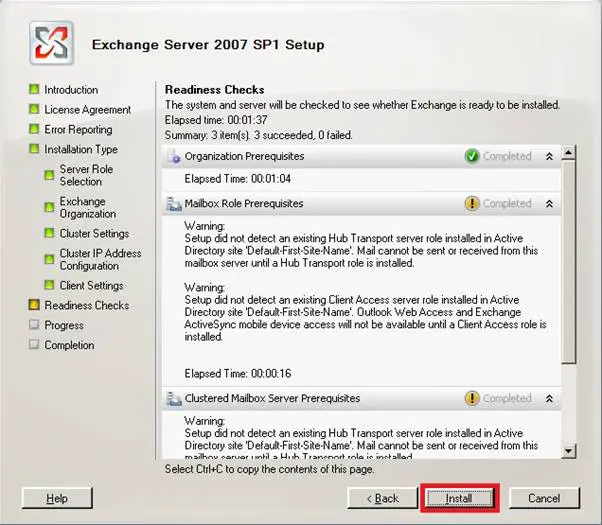
After readiness check is complete click Install.
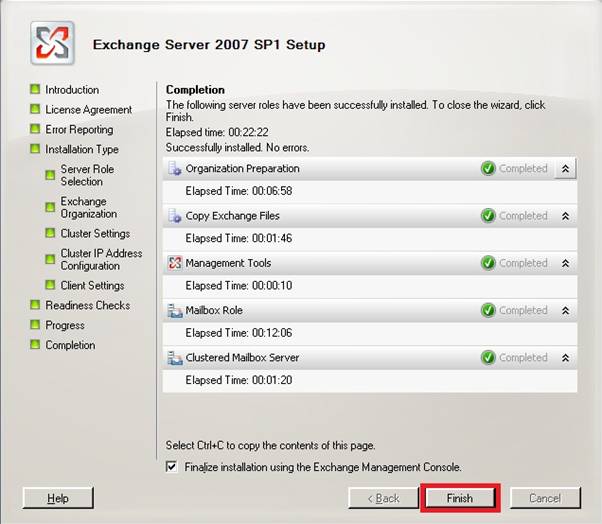
Click on Finish upon completion of exchange 2007 installation.
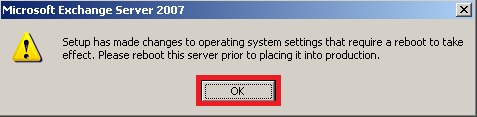
A pop-up window will appear then click on Ok.
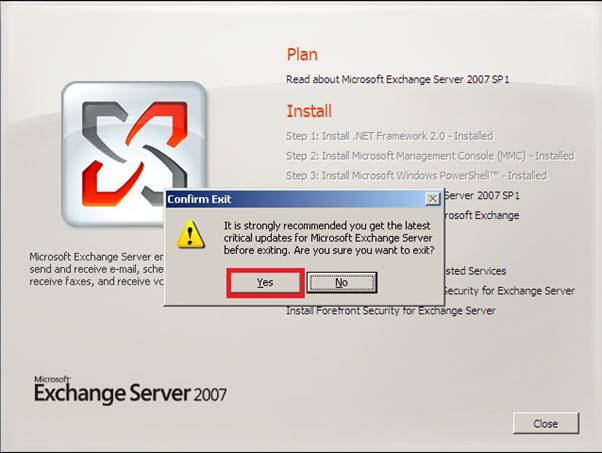
Now click on Close.

A Confirm Exit window will show. Click on Yes to confirm Exit and restart the system for changes to take effect.
Passive Node
On the machine proposed for passive mailbox node, go to the installation source in DVD or where you have copied it after downloading.
Select SETUP.EXE which is usually found on the bottom part of the installation folder.
Double click this executable file to start the setup process.
Exchange Server 2007 window will open.
Same with the Active Node process, here you can see that first 3 steps are grayed out because we have already installed pre-requisites and it also detected the exchange setup. If any of the first 3 steps are not grayed out please review your installation steps and repeat the installation procedure to correct the issues.
Now move to Step 4: Install Microsoft Exchange 2007 SP1 and click this option to begin installation.
In the introduction screen, click Next to proceed.
Under License Agreement, select I accept the terms in the license agreement and click on Next.
Next screen will show Error Reporting. Select Yes (recommended).
Click Next.
On the Installation Type, you have two options: either you can go for typical installation which can install multiple roles on same box or you can select an individual role for this specific machine.
The scope of this document is to install Client Access Server only so we will click on second option which is Custom Exchange Server Installation.
After choosing the installation type, click on Browse button to indicate the path where you plan to put all the installation. In this example we are choosing a folder created for CAS installation on C drive.
Click Next.
Server Role Selection screen will appear. Here you have choices to select any one or more server roles.
Select Passive Clustered Mailbox Role and click on Next.
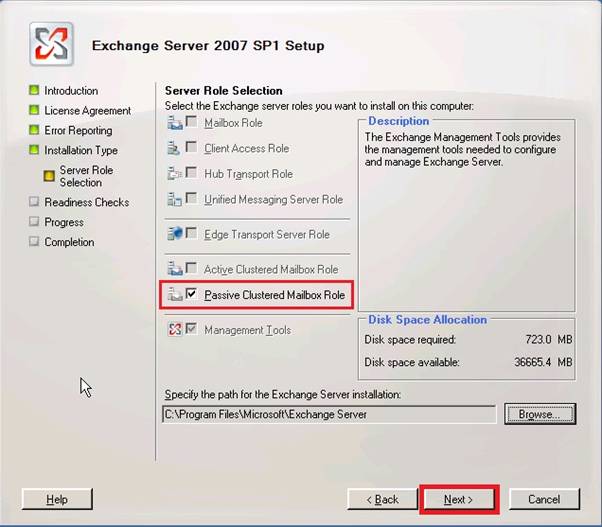
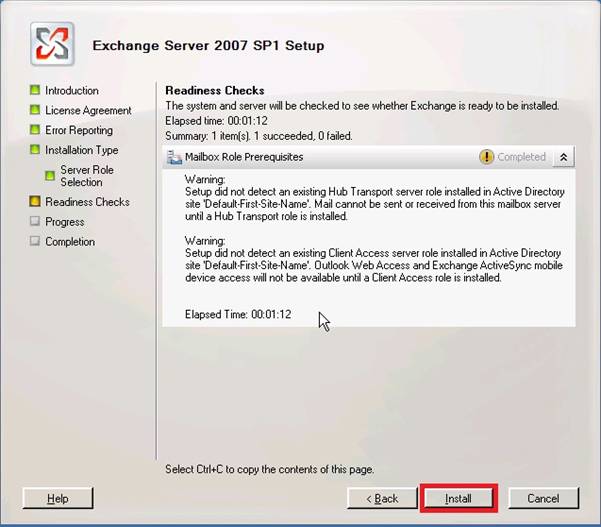
After readiness check is complete click Install.
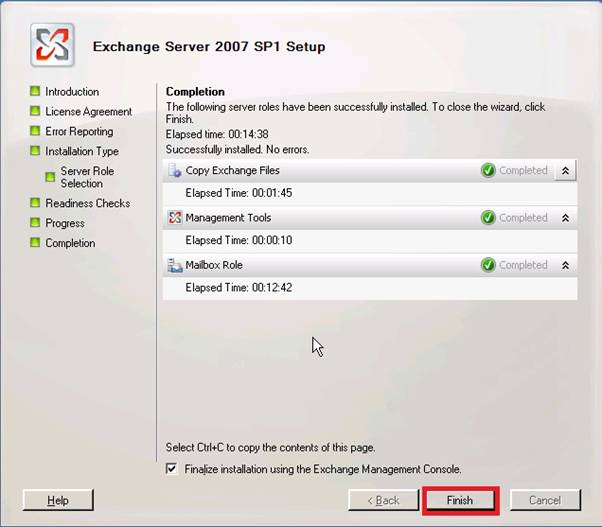
As this is the passive node installation, most of the settings have already been modified inactive node and no longer required to configure such settings.
Click Finish.
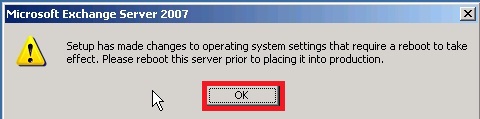
A pop-up window will appear then click on Ok.
Now click on Close.
A Confirm Exit window will show. Click on Yes to confirm Exit and restart the system for changes to take effect.

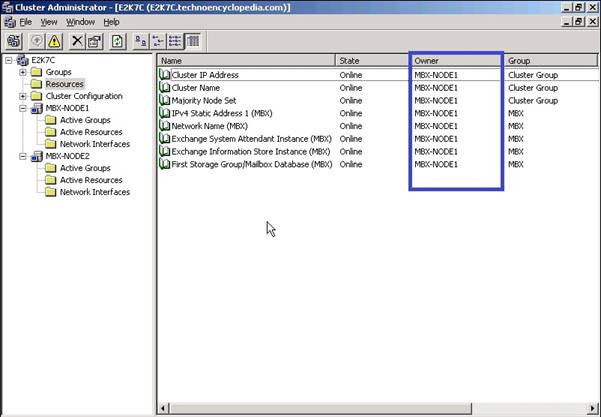
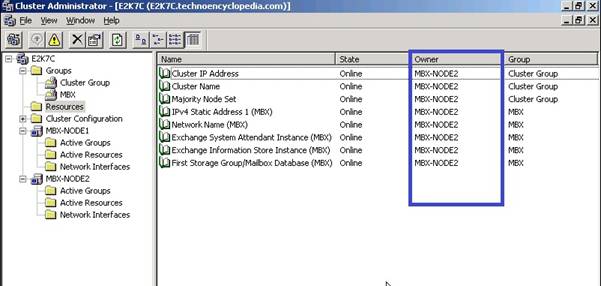
Now that clustered mailbox has been installed you may verify by opening Cluster Administrator window on any node, then go to Resources folder and you should see all the server and exchange resources available.
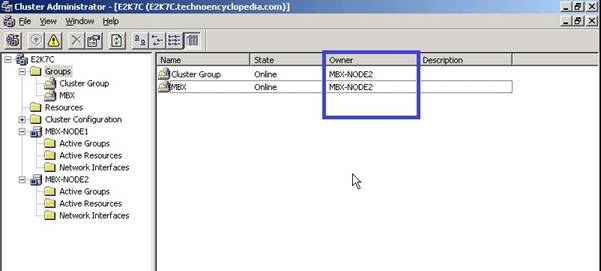
Select the Groups folder.
In the right pane, right click Cluster Group and from the action menu select Move Group.
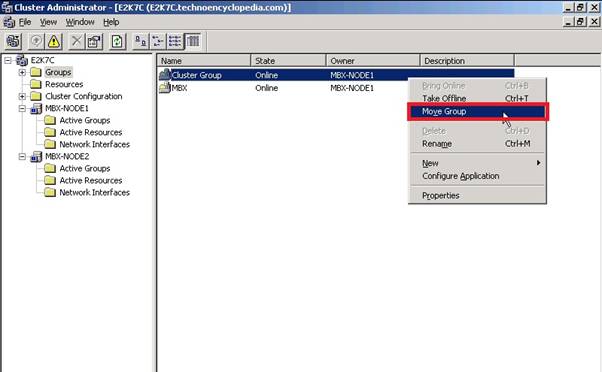
The owner of cluster group will change from mbx-node 1 to mbx-node 2.
Now right click MBX and from the action menu select Move Group.
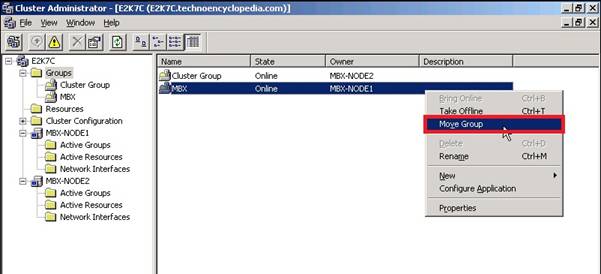
The owner of MBX will also be changed to mbx-node2 confirming proper functionality of clustered mailbox.
Under the Resources folder all resources can now be seen under the ownership of second node.
Conclusion
Exchange 2007 mailbox clustering has been configured successfully and can be verified by moving resources between two nodes of CCR cluster.
Now exchange mailbox role is highly available for smooth working. If one node goes down due to any network, application or hardware issues, the resources will shift to second node automatically.


 to ensure high availability and disaster recovery for your email system.)